Using Windows 11, you may have to reinstall the entire operating system. This is because Windows 11 is still being tested, and it has many bugs & glitches.
Occasionally, you may face certain problems forcing you to reinstall Windows 11. While reinstalling Windows 11 is easy, what about the data & apps installed on your device? If you reinstall Windows 11 without proper planning, you may lose all your apps & data.
You can backup your important data on the cloud services to minimize the data loss, or you can force Windows 11 to reinstall itself without deleting your apps or data. You can perform an in-place upgrade to reinstall Windows 11 without losing data or deleting any apps.
Below, we have shared a few simple ways to reinstall Windows 11 without deleting any apps or data. Hence, if you want to reinstall Windows 11 without losing any data, you may find this guide helpful. Let’s get started.
1) Reinstall Windows 11 Without Deleting Apps Using Bootable USB
This method will use a Bootable USB flash drive to reinstall Windows 11 without deleting apps. Here’s what you need to do.
- First, plug in your Windows 11 Bootable USB flash drive. Once done, open File Explorer and run the setup.exe file.
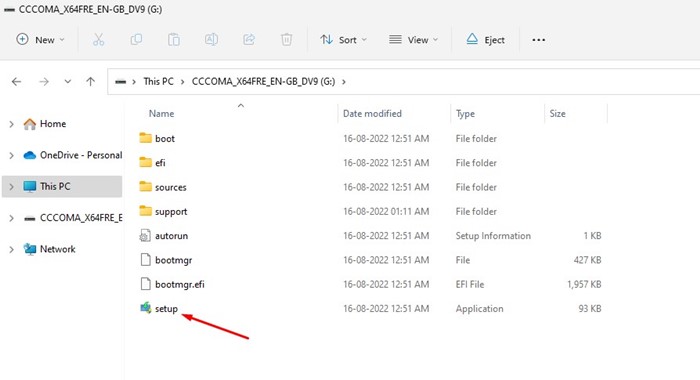
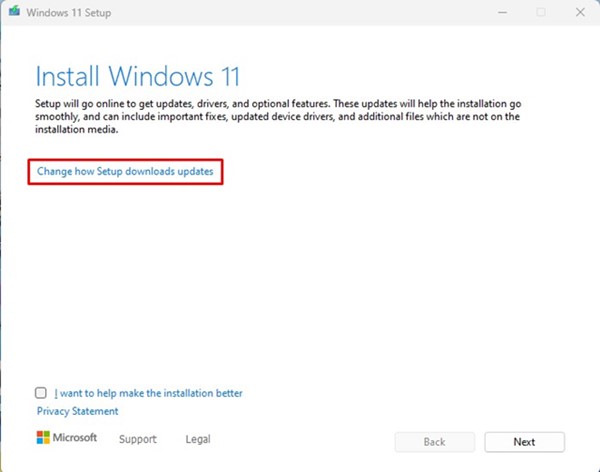
- Now, on the Install Windows 11 wizard, click the Change how setup downloads updates.
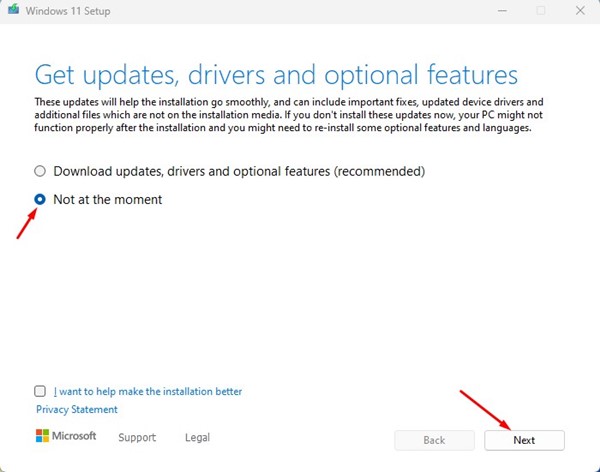
- On the next screen, select the Not at the moment option and click the Next button.
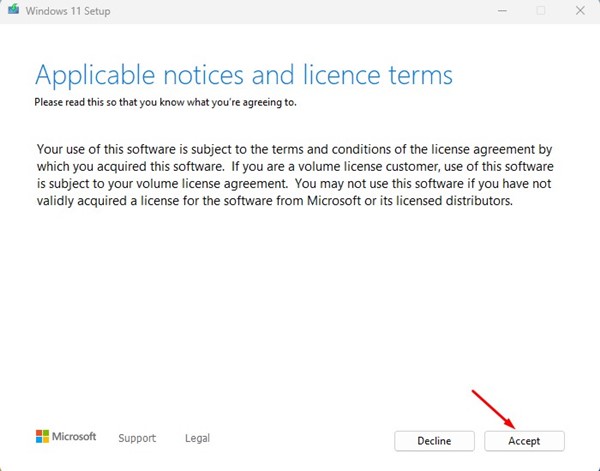
- Accept the terms and conditions and click on the Next button.
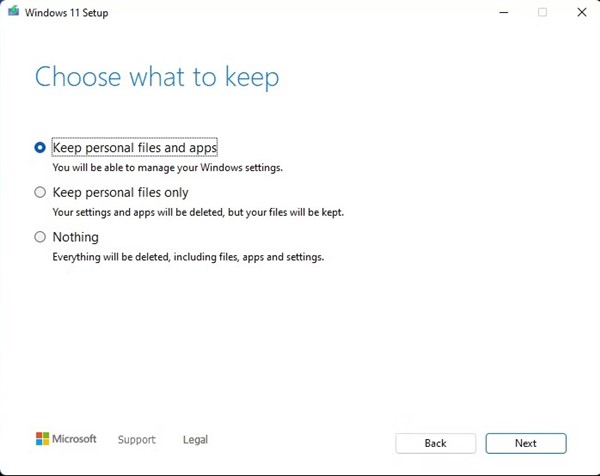
- Now, select Keep personal files and app and click on the Next button on the Choose what to keep the screen.
- Review all your settings on the Ready to install Window and click on the Install button.
That’s it! This will reinstall Windows 11 on your computer without deleting any data or apps.
2) Repair Windows 11 Installation Using ISO image file
In this method, we will use Windows 11 ISO file to repair the Windows installation. For that, follow some of the simple steps we have shared below.
- First, download Windows 11 ISO file and save it on your computer.
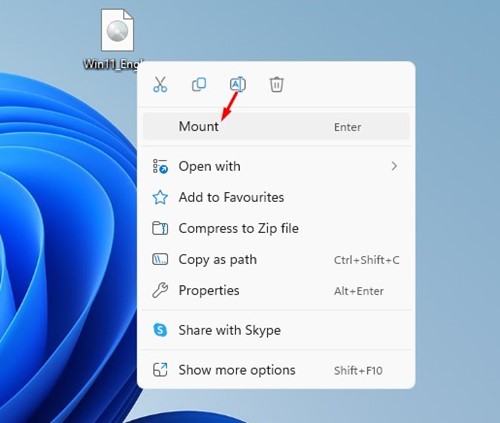
- Once downloaded, right-click on the Windows 11 ISO file and select the Mount option.
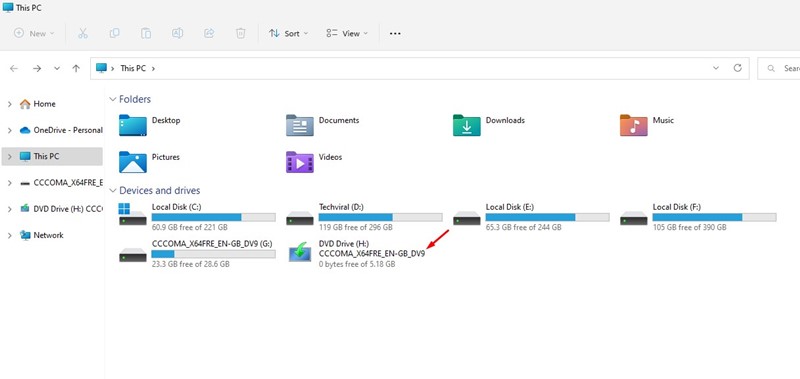
- Open your PC’s File Explorer and your newly mounted virtual drive.
- Next, on the Windows 11 Setup Wizard, click on the Change how setup downloads update option.

- On the next screen, select Not at the Moment and click on the Next button.

- Next, accept the terms & conditions, and on the Ready to Install Window, select Change what to keep.
- On the next screen, select the Keep personal files and apps option and click on the Next button.

- That’s it! Now follow the on-screen instructions to complete the Windows 11 upgrade process.
Reinstall Windows 11 Using Windows Settings
You can also use Windows 11’s Settings app to reinstall Windows 11 without deleting your files and apps. Here’s how you can reinstall Windows 11 using Windows Settings.
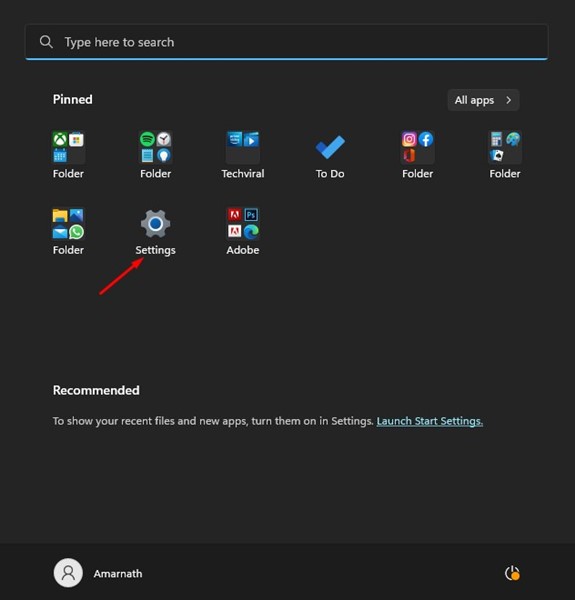
- First, click on the Windows 11 search and select Settings.
- Select the Windows Update on the left sidebar of the Settings app.
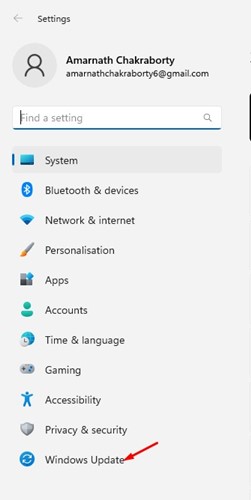
- On the right side, click on Advanced Options.

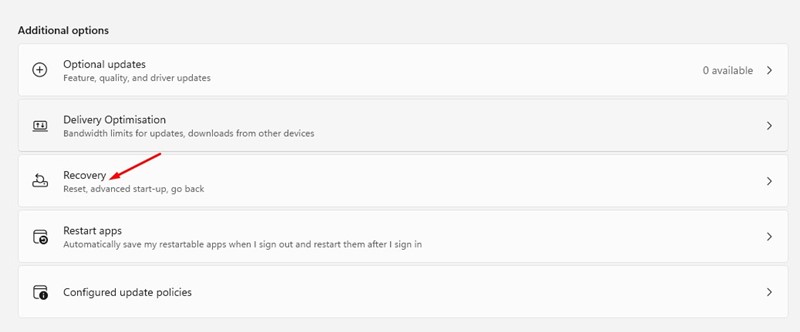
- Now scroll down to the Additional Options and click on Recovery.
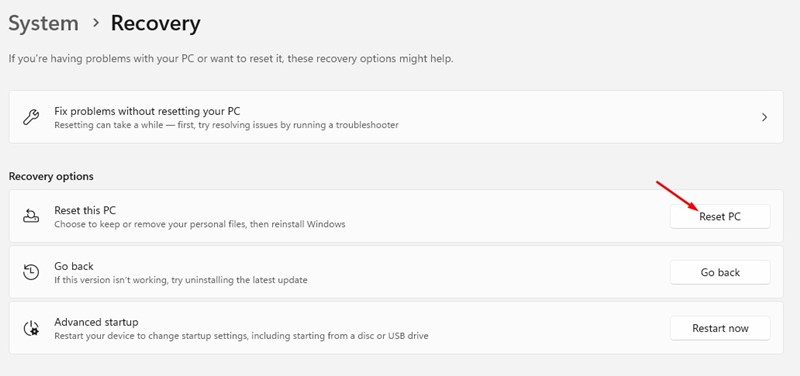
- On the Recovery options, click on the Reset PC.
- On the Choose an option Window, select Keep my files.
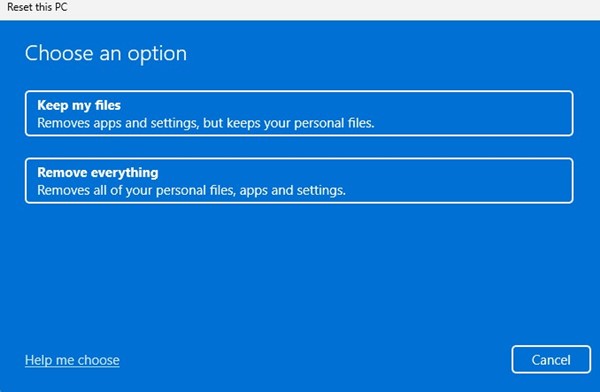 Note: Keep my files option will only keep your files but will remove apps and settings.
 - You will be asked to select how you’d like to re-install Windows. If you have the ISO file, you need to choose Local reinstall. Select the Cloud download option if you want to download the latest files from the internet.
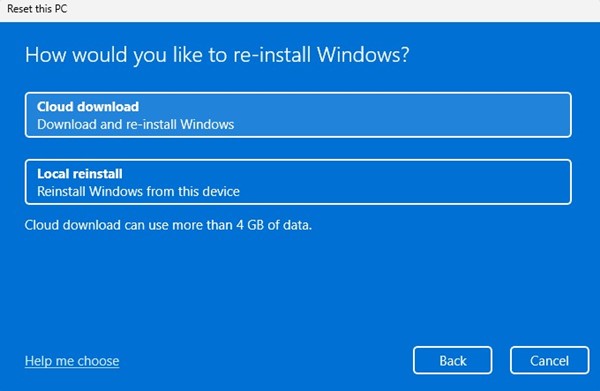
- Next, click the Reset button on the Ready to Reset this PC screen.
That’s it! Now you need to wait until the process completes. Once completed, you will have a fresh installation of Windows 11 with your files. You would need to download your apps again.
Also read: Windows 11 ISO Free Download Full Version
So, these are the three best ways to reinstall Windows 11 without losing any data. All three methods worked at the time of writing. If you need more help reinstalling Windows 11, let us know in the comments below.
The post How to Reinstall Windows 11 Without Losing Data and Apps appeared first on TechViral.

