Almost all apps that you use on your Android smartphone attempt to track your location. The problem is that most apps try to keep this thing secret from you, but Google Maps doesn’t. Google Maps has a transparent policy when it comes to using your location.
Being a navigation app, Google Maps will use your location data to provide accurate information. However, while you are not using Google Maps, it continues to gather the location information in the background. Google does this thing to improve its navigation app and provide you with a Google Maps timeline.
Google Maps timeline is a feature that lets you see where you traveled on a specific day, month, or year. It also shows the countries, tourist spots, restaurants, towns and other places you visited. The feature is available for every user, but your phone should have the Location History enabled to make it work.
Steps to Check Your Google Maps Timeline on Android
So, if you are interested to see where you have been with the Google Maps Timeline, you are reading the right guide. Here we have shared a step-by-step guide on how to enable & use the Google Maps timeline feature. Let’s check out.
1. Enable Location History
Your Google Account should have Location History enabled to view the Google Maps timeline. Here’s how you can enable the location history on Android.
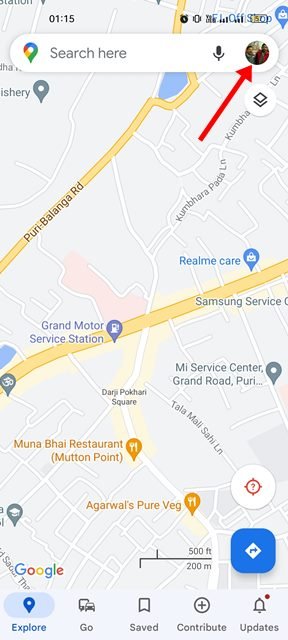
1. First, open the Google Maps app on your Android device. Next, tap on the profile picture displayed in the top-right corner.
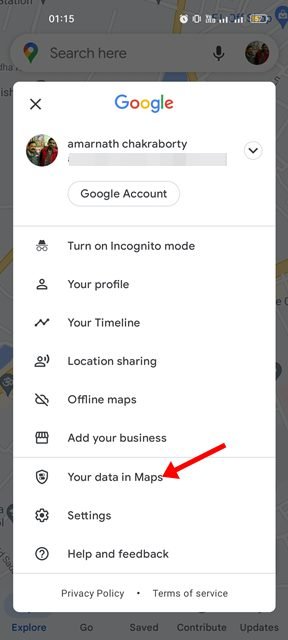
2. On the pop-up menu, select Your data in Maps.
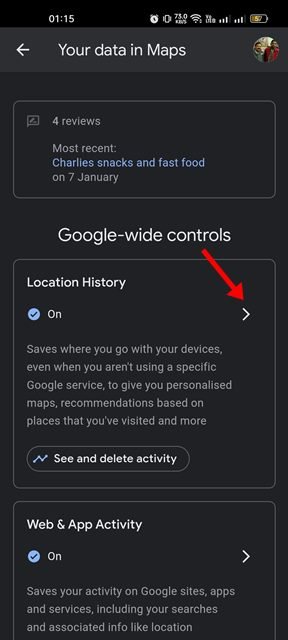
3. On the Your data in Maps page, scroll down and tap on the Location History option.
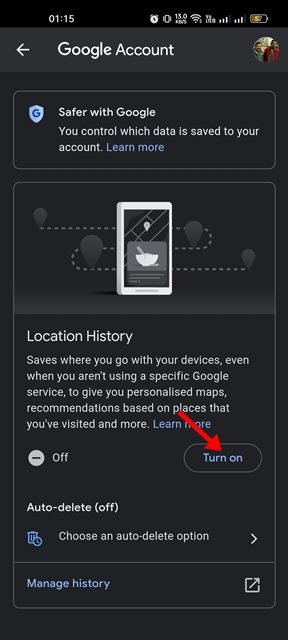
4. If Location History is disabled, tap on the turn-on button.
That’s it! This will enable the Location History on your Android device. If you have just enabled Location History, you won’t see any places you have visited before in the Timeline. Location history will continue to gather the location data from when it has been enabled.
2. View Your Google Maps Timeline
If you already have the Location History enabled on your device, you can view your past location data in the Google Maps Timeline. Here’s how to view your Google Maps Timeline.
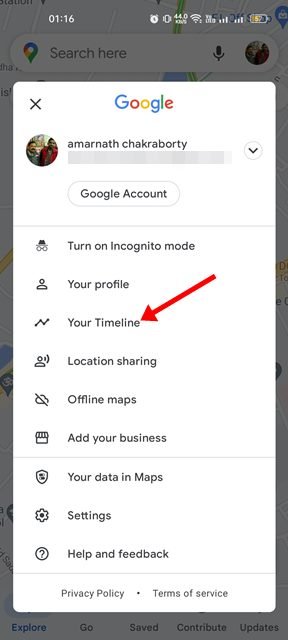
1. First, open the Google Maps app on your Android. Next, tap on the Profile picture as shown below.
2. On the pop-up that appears, tap on the Your Timeline.
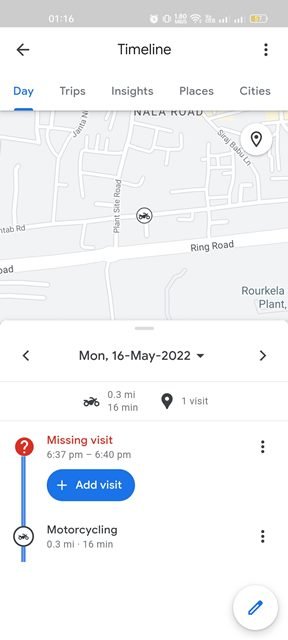
3. On the Timeline page, you will see the day’s location history. You can change the month as per your wish.
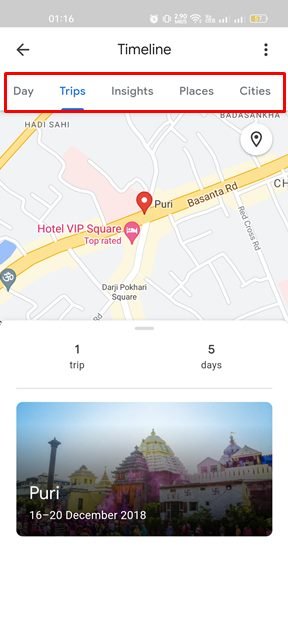
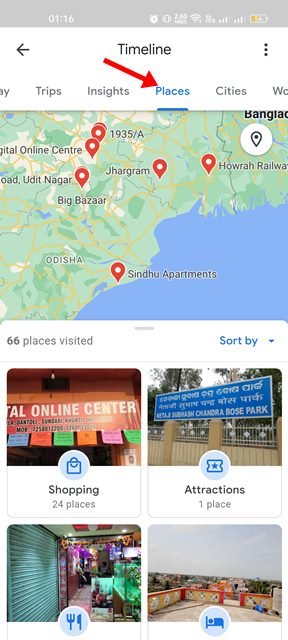
4. You will find many sections at the top like Trips, Insights, Places, Cities, and World.
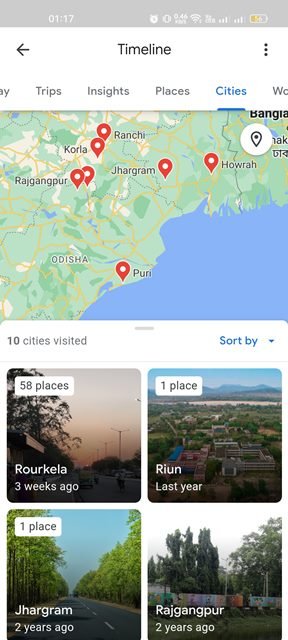
5. You need to explore each section to view the location history. For example, if you select the Cities tab, the Timeline will show you the number of Cities you have been on.
6. Similarly, selecting the Places will show you all the famous places you have visited before.
That’s it! This is how you can see where you have been with the Google Maps Timeline feature. If you don’t want Google to track your location, you need to disable the location history in Google Maps.
So, this is how you can check your Google Maps timeline and see every place you have visited so far. Google Maps also has other features like checking live train running status, checking the traffic, and more. If you need any more help regarding the Google Maps timeline, let us know.
The post How to Check Your Google Maps Timeline on Android appeared first on Tech Viral.

