Windows 11 insider build 25120 is now available in the Dev channel, and every user who joined the channel can install the new update right now. Although the Windows 11 builds released on the Dev channel are supposed to bring new features, this time, the build doesn’t have features that are worth mentioning.
However, the new Windows 11 Build 25120 supports a new experimental search bar that appears on the desktop. So, if you are already running Windows 11 build 25120, you can easily enable the new desktop search bar in Windows 11.
New Desktop Search bar in Windows 11
The new search bar sits on the desktop, and Bing powers it. That means Windows 11 will fetch every search term entered in the search box from its Bing Search engine. While the feature is helpful, as it allows searching the web without opening a web browser, it could be a huge turn-off to those not a fan of Bing Search.
Also, the feature is not available to every user running the Windows 11 build 25120. This is because Microsoft is testing the feature by releasing it to a limited number of users. Therefore, the chances of getting hands on the new feature, even if you are using the build 25120, are still very low.
Steps to Enable the New Desktop Search Bar in Windows 11
However, a workaround enables the new experimental search bar on your Windows 11 build 25120. Hence, if you are interested in giving the new desktop search bar a try, you need to install the ViveTool. Here’s how you can enable the desktop search bar in Windows 11.
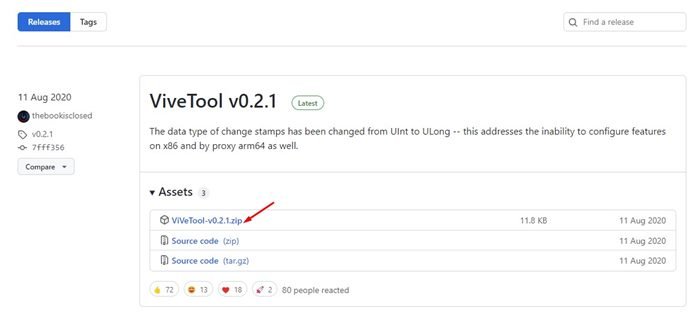
1. First, open your favorite web browser and visit the ViveTool Github page. Next, download the ViVeTool zip file on your computer.
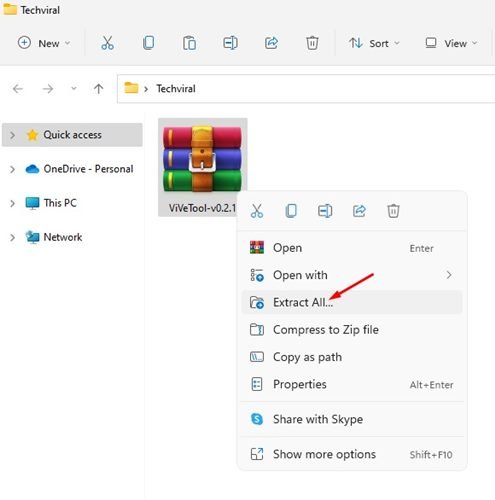
2. Once downloaded, right-click on the ViveTool ZIP file and select the Extract all option.
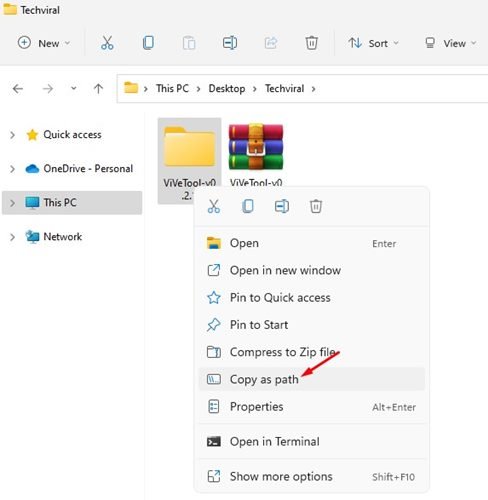
3. Once extracted, right-click on the extracted folder and select the Copy as a Path option.
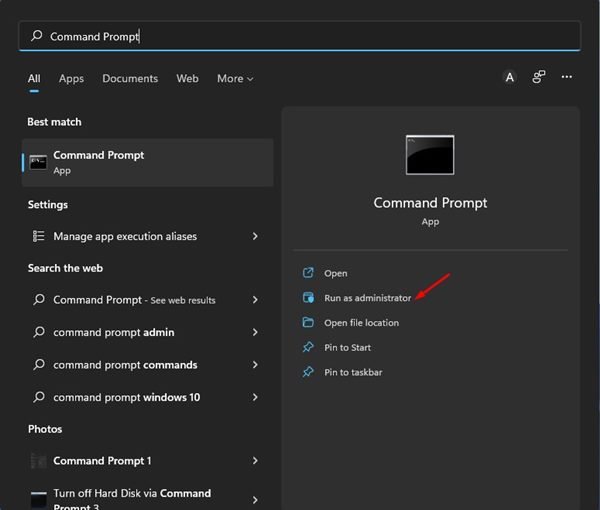
4. Now open Windows 11 search and type in Command Prompt. Right-click on the Command Prompt and select Run as administrator.
5. On the command prompt window, type in cd and paste the path you have copied in Step 3. The full command would look like this: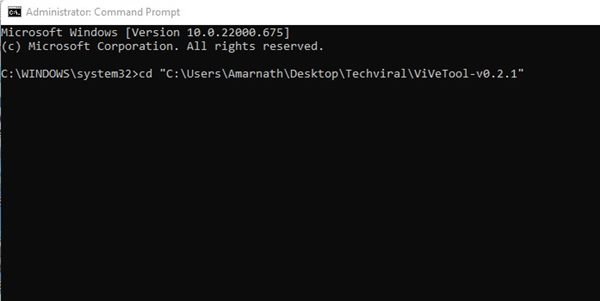
cd "C:\Users\Amarnath\Desktop\Techviral\ViVeTool-v0.2.1"
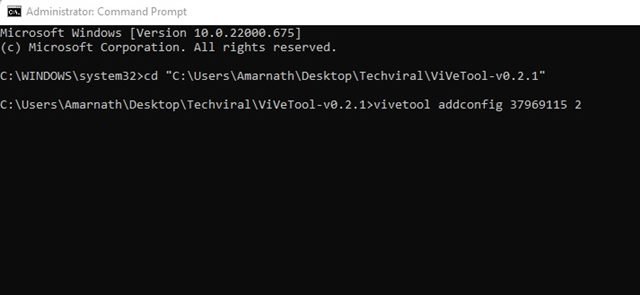
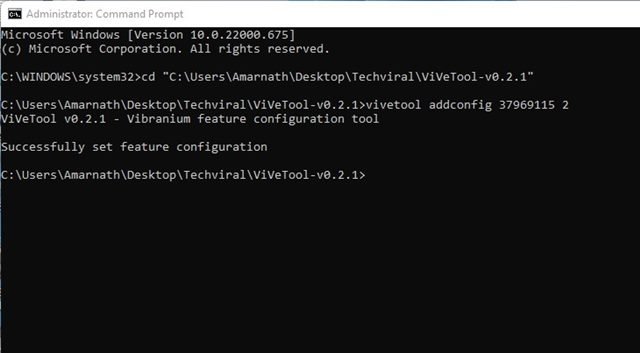
6. Once done, execute the command:
vivetool addconfig 37969115 2
7. Close the Command Prompt and restart your Windows 11 computer after executing the command.
8. After the restart, right-click on the desktop and select the Show more options. On the full context menu, check the Show search option.
That’s it! This will enable the experimental desktop search bar on your Windows 11. If you wish to disable the search bar, right-click on the desktop > Show more options and uncheck the Show search option.
So, that’s all about how to enable the experimental desktop search bar in Windows 11. Just like the new search bar, Windows 11 also got a new Task Manager, which you can enable by using the ViveTool. If you need any more help, let us know in the comments.
The post How to Enable the New Desktop Search Bar in Windows 11 appeared first on Tech Viral.

