If you have been using Windows 11 for quite some time, you may have already deal with many problems. This is because the OS is still in the testing phase, and right now, it has many bugs and glitches. It’s common for Windows 11 users to face issues like Start Menu crash, Search not working, File Explorer lags, and more.
If we talk about File Explorer, it’s one of the essential utilities of Windows, and you get a redesigned File Explorer interface on Windows 11. While the File Explorer of Windows 11 looks good, it has many problems.
Recently, a few Windows 11 users have reported lagging issues while opening the File Explorer. Not only that, but many users have also said that the File Explorer is taking too long to load files stored on the hard drive.
6 Ways to Fix Slow File Explorer in Windows 11
So, if you feel that your Windows 11’s File Explorer is taking too long to load your files, you have landed on the right page. This article will share the few best methods to fix the Windows File Explorer when it’s slow. So, let’s get started.
1) Restart the Windows Explorer
If your Windows 11 File Explorer takes forever to load files stored on the HDD/SSD, it’s best to restart the Windows Explorer from the Task Manager. Follow some simple steps shared below to restart the Windows Explorer on Windows 11.
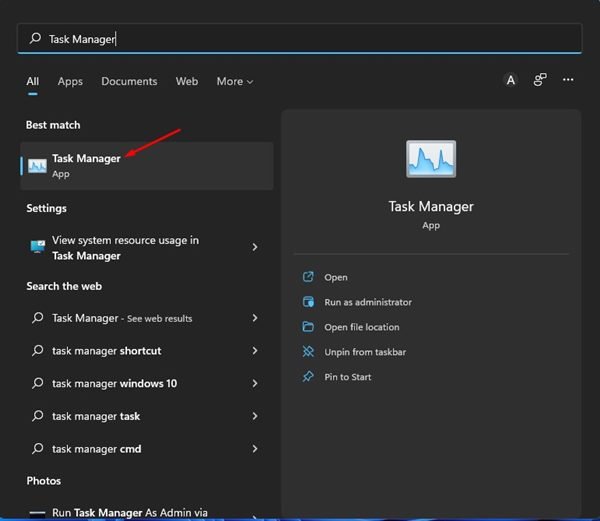
1. First, click on the Windows 11 search and type in Task Manager.
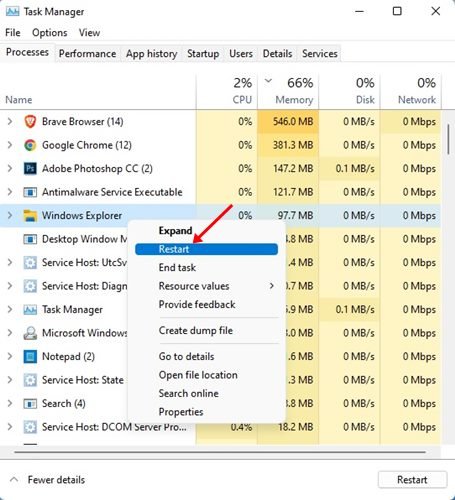
2. On the Task Manager, find the Windows Explorer.
3. Right-click on the Windows Explorer and select Restart.
That’s it! After restarting the Windows Explorer, open the File Explorer again and check if the problem is resolved.
2) Close Unnecessary Programs
File Explorer lagging or taking a long time to load files doesn’t always have to be linked with software problems. Running too many programs in the background also impacts the speed of File Explorer. Hence, you need to close all programs you are not using to free up some memory, which will eventually fix the slow File explorer problem.
1. First, click on the Windows 11 search and type in Task Manager.
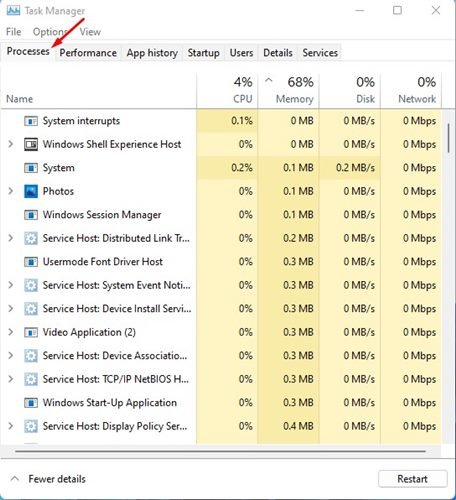
2. On the Task Manager, switch to the Processes tab. Now, look at the list of programs running in the background and using Memory.
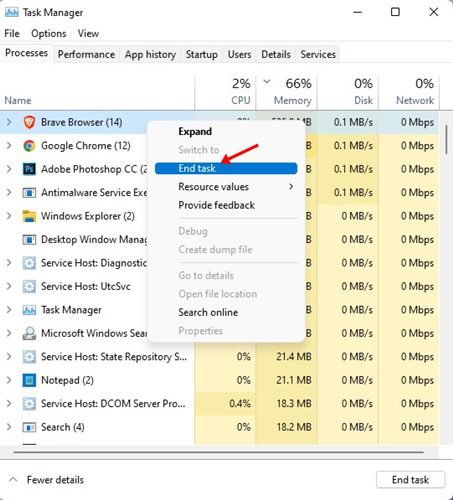
3. If you find any unnecessary app on the list, right-click on it and select End Task.
4. You need to repeat the process to kill all apps you don’t use.
That’s it! This is how you can reduce the number of apps running in the background to fix the Windows 11 File Explorer lagging issue.
3) Disable the Quick Access Menu
Although the Quick Access Menu on Windows 11 File Explorer is helpful, it also slows down the speed of File Explorer. Hence, you can also try disabling the Quick access menu to fix Windows 11 File Explorer slow issue.
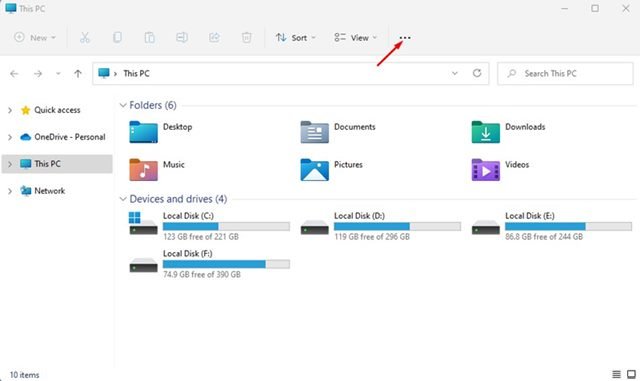
1. First, open the File Explorer and click on the three dots as shown below.
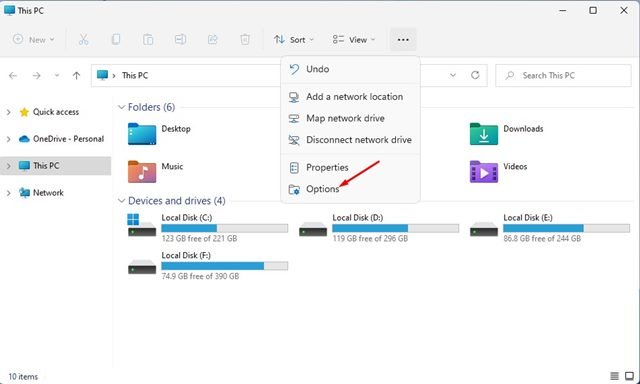
2. On the menu that appears, select Options.
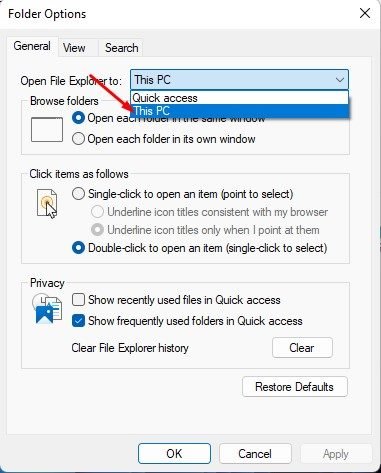
3. On the Folder Options, select ‘This PC’ on the dropdown menu for Open File Explorer.
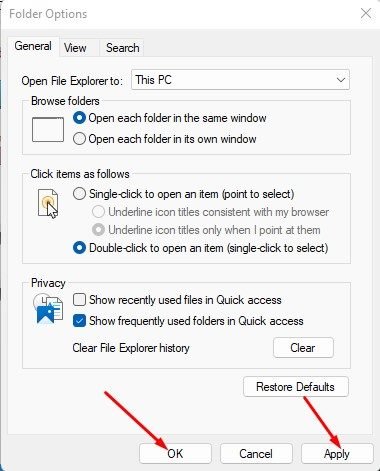
4. Once done, click on the Apply button and then on the Ok.
That’s it! This will disable Quick Access on your Windows 11 computer.
4) Clear the File Explorer History
If your Windows 11 File explorer is still lagging or taking lots of time to load the files, you can try clearing the File Explorer History. Here’s how you can remove the File Explorer history in Windows 11.
1. First, open the File Explorer and click on the three dots as shown below.
2. On the menu that appears, select Options.
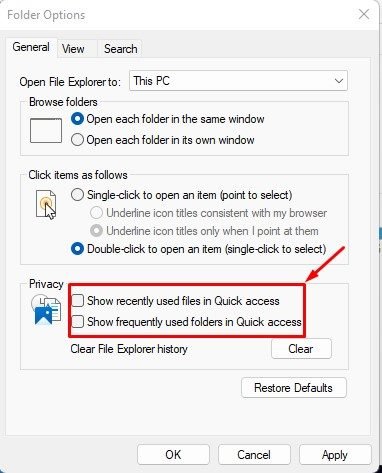
3. On the Folder options, uncheck the two options – Show recently used files in Quick Access and Show frequently used folders in Quick access.
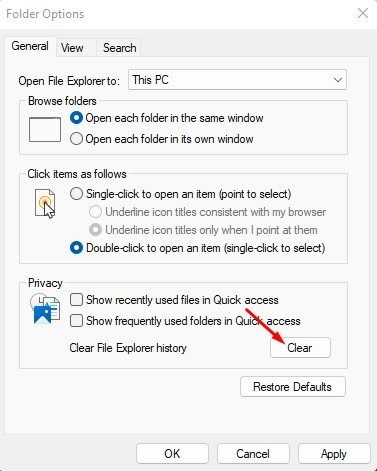
4. Once done, click on the Clear button behind the Clear File Explorer history.
That’s it! This is how you can clear File Explorer history in Windows 11 to fix File Explorer problems.
5) Configure the Folder Optimization in Windows 11
If the File Explorer lags or takes forever to load a specific folder containing lots of files and subfolders, you need to configure the folder optimization settings. Here’s how to configure the Folder optimization settings in Windows 11.
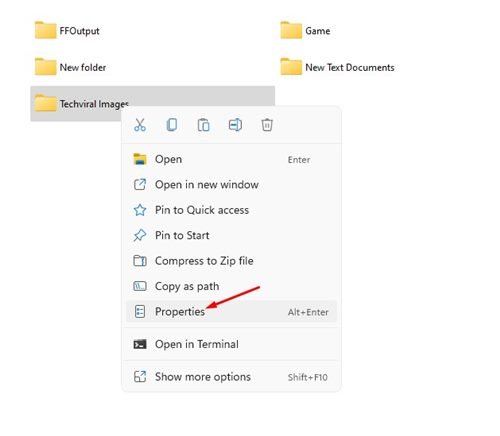
1. First, right-click on the folder you want to optimize and select Properties.
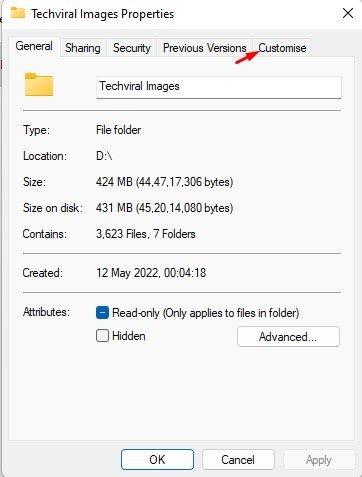
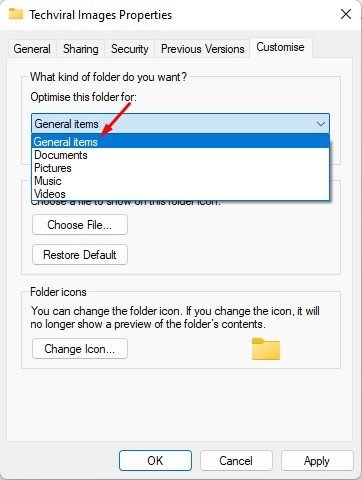
2. On the Folder Properties, switch to the Customize tab.
3. Next, click on the Optimize this folder for the drop-down menu and select General items.
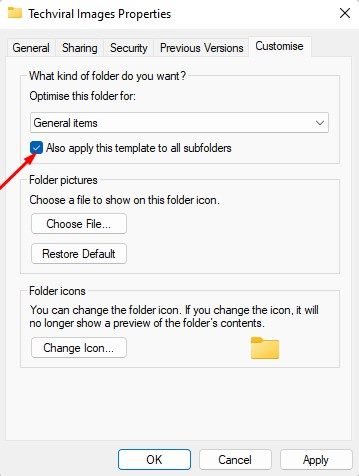
4. Once selected, check the option ‘Also apply this template to all subfolders’
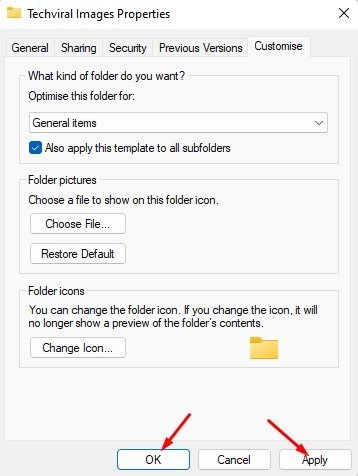
5. Once done, click on the Apply button then on Ok.
That’s it! This will resolve Windows 11 File explorer slow issue on your PC/Laptop.
6) Troubleshoot Windows Search and Indexing
If you are experiencing problems while utilizing the Windows Search on the File Explorer, you must follow this method. We will troubleshoot the Windows Search and Indexing service to fix File explorer’s slow search bar.
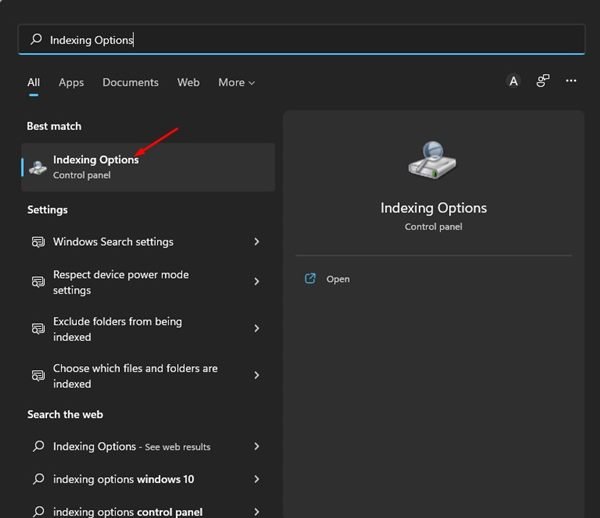
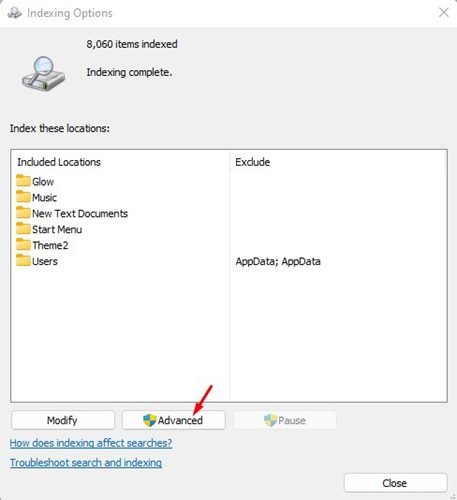
1. First, open the Windows 11 search and type in the Indexing options.
2. On the Indexing Options, click on the Advanced button.
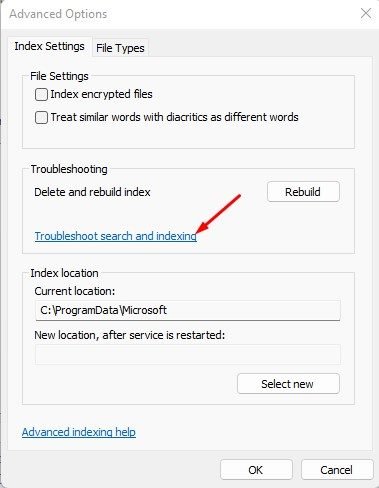
3. On the Advanced Options, click on the Troubleshoot search and indexing link.
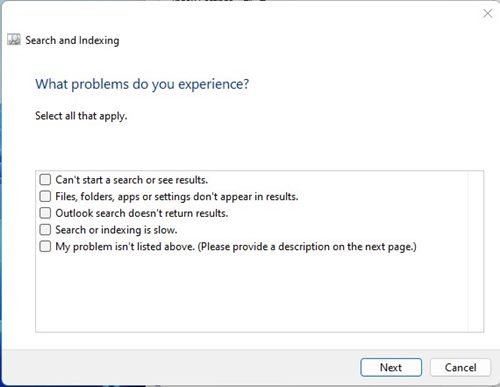
4. On the Search and Indexing troubleshooter, pick the problem you are experiencing and click on the Next button.
5. You need to follow the on-screen instructions to complete the troubleshooting process.
That’s it! You are done. Once the troubleshooting process completes, you need to restart your PC.
So, these are some of the best ways to fix Windows 11 File Explorer’s slow and lagging issues. Windows 10 users facing the same problem can also follow these methods to resolve File explorer issues. If you have found any other way to fix File Explorer slow or lag issue on Windows 11, let us know in the comment box.
The post How to Fix Slow File Explorer in Windows 11 (6 Methods) appeared first on Tech Viral.

