If you’re a Windows 11 user, you probably know about the DirectX Diagnostic Tool. In case you don’t, DirectX Diagnostic Tool (DxDiag) is basically a tool for troubleshooting graphical and sound problems on Windows.
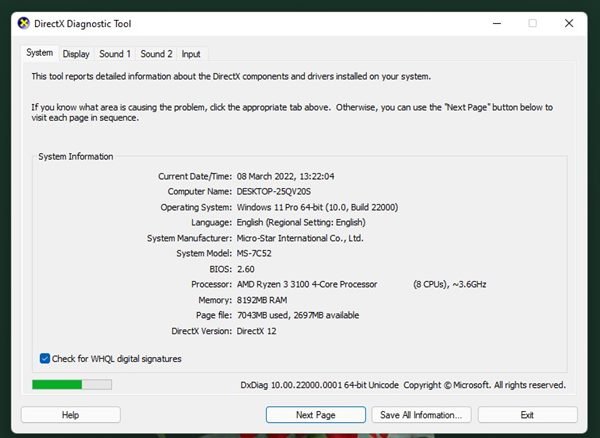
Even if your PC does not have any problems, you can use the DirectX Diagnostic Tool to find detailed information about DirectX drivers and components. It can gather information about the motherboard, RAM, processor, graphics card, and audio.
At some point, you will need to access DirectX diagnostic tool data. For example, when troubleshooting for errors, the software/hardware support team may ask for DxDiag information. You can even use it to check system and VDU specs for gaming purposes.
6 Best Ways to Open DirectX Diagnostic Tool on Windows 11
Whatever might be the reason, it’s pretty easy to access the DirectX Diagnostic tool on Windows 11. So, if you are looking for ways to open the DirectX Diagnostic Tool, you are reading the right guide.
Below, we have listed 6 best ways to open the DxDiag tool on Windows 11. Let’s check out.
1) Open DirectX Diagnostic Tool with RUN
This is probably the easiest method to open DirectX Diagnostic Tool on Windows 11 operating system. It’s pretty easy to open the DirectX Diagnostic Tool via the RUN command. Just follow some of the simple steps shared below.
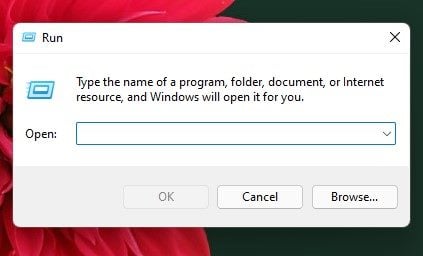
1. First of all, press the Windows Key + R button. This will open the RUN dialog box.
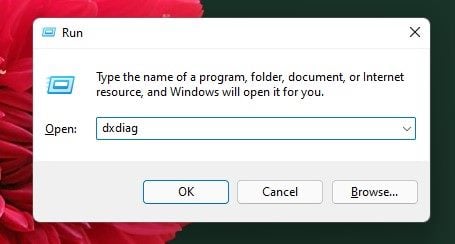
2. On the RUN Dialog box, enter dxdiag and hit the Enter button.
3. Now, Windows 11 will run the DirectX Diagnostic Tool and will show you the detailed information.
This is how easy it is to access the DirectX Diagnostic Tool via the RUN dialog box.
2) Open DirectX Diagnostic Tool via Windows 11 Search
You can directly open the DirectX Diagnostic Tool on your Windows 11 by utilizing the Search feature. This process is more straightforward than the previous one. Here’s what you need to do.
- First of all, press the Windows + S key to open Windows 11 search.
- You can even click on the Search button on the taskbar to open the Search panel.
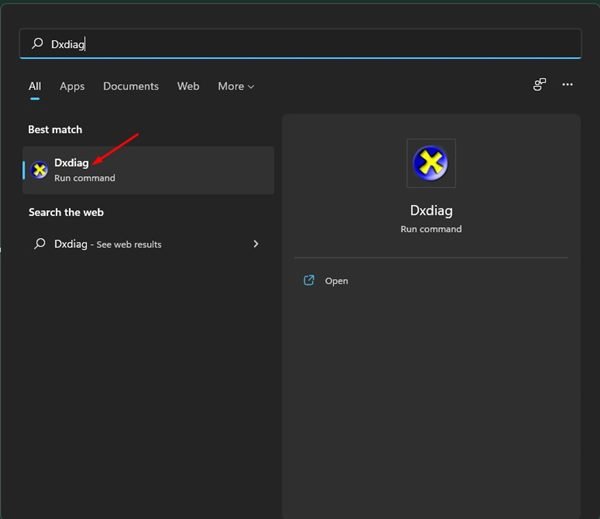
- On the Windows 11 search, type in Dxdiag and open the DxDiag tool from the list.
That’s it! You are done. This is how you can open the DirectX Diagnostic Tool via Windows 11 search.
3) Open DirectX Diagnostic Tool via Task Manager
As the Windows 11 search menu, you can use the Task Manager of Windows 11 to open the DirectX Diagnostic Tool. To open DirectX Diagnostic Tool via task manager, follow some simple steps shared below.
1. First of all, press the CTRL + ALT + Delete key on your keyboard. Next, select the Task Manager option.
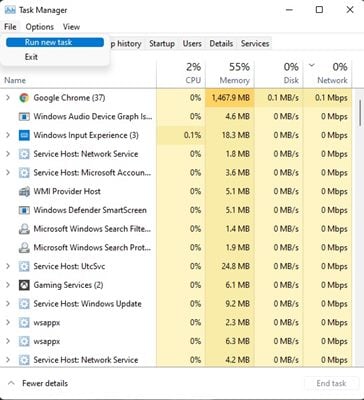
2. On the Task Manager, click on the File menu and select the Run new task option.
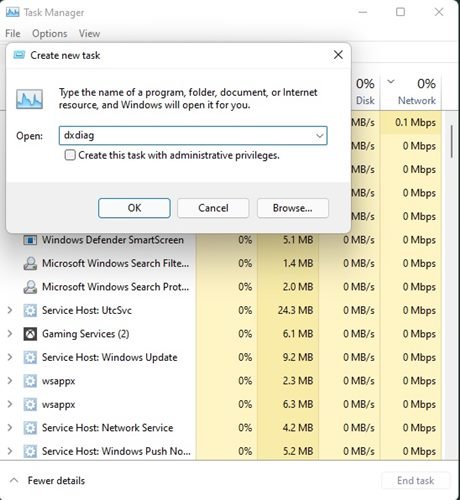
3. On the Create new task window, type in dxdiag and hit the Enter button.
That’s it! You are done. This will open the DirectX Diagnostic Tool on your Windows 11 computer.
4) Open DirectX Diagnostic Tool via Desktop Shortcut
If you are looking for an even easier way to access the DirectX Diagnostic Tool tool, you need to create a desktop shortcut. Here’s what you need to do.
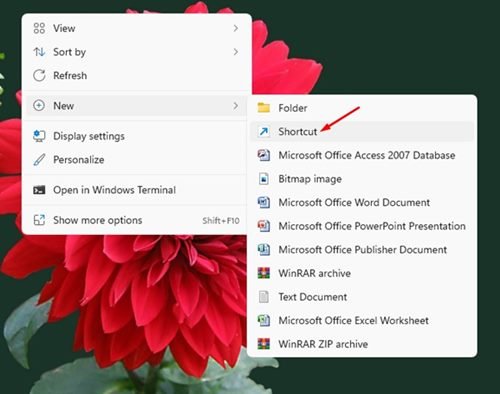
1. First of all, right-click on a blank area on your desktop and select New > Shortcut.
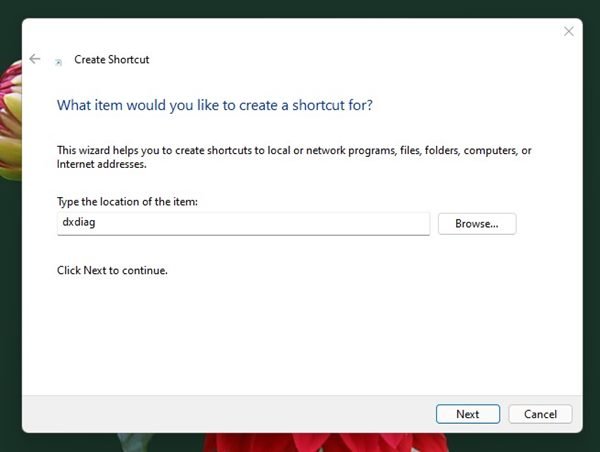
2. On the Create Shortcut window, type in dxdiag on the Location field and click on the Next button.
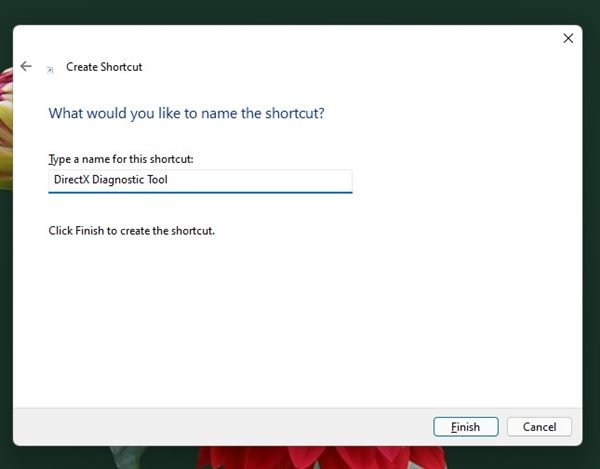
3. You will be asked to enter the name for the new shortcut. Simply name it DirectX Diagnostic Tool and click on the Finish button.
4. Now, you will find the DirectX Diagnostic Tool desktop shortcut. To access the tool, just double-click on it.
That’s it! You are done. It’s pretty easy to create a desktop shortcut for accessing the DirectX Diagnostic Tool on Windows.
5) Open DirectX Diagnostic Tool from the Context Menu
Since Windows 11 allows you to customize the right-click menu, you can customize the right-click menu and add the DirectX Diagnostic Tool on it. Here’s how you can do it.
1. First of all, press the Windows Key + R button on your keyboard. This will open the RUN dialog box. On the RUN dialog box, enter regedit and hit the Enter button.
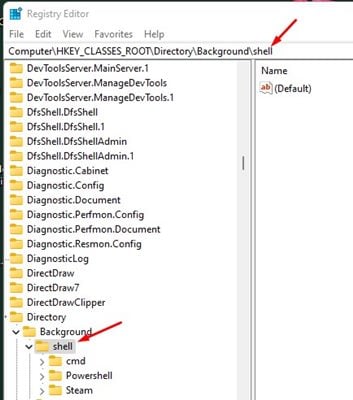
2. Now, on the Registry Editor, navigate to the path:
Computer\HKEY_CLASSES_ROOT\Directory\Background\shell
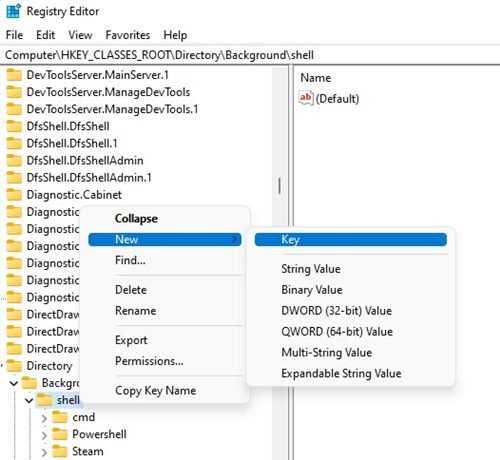
3. Now right click on the Shell key and select New > Key.
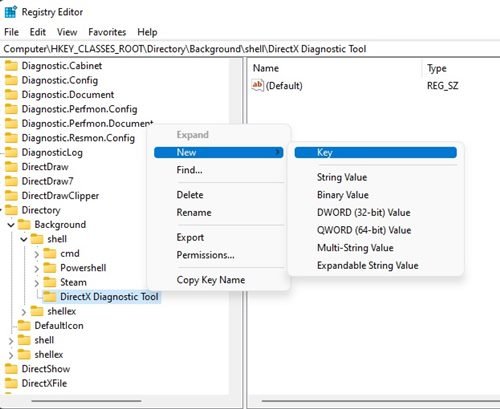
4. Name the new key DirectX Diagnostic Tool. Now, right-click on the DirectX Diagnostic Tool key and select New > Key.
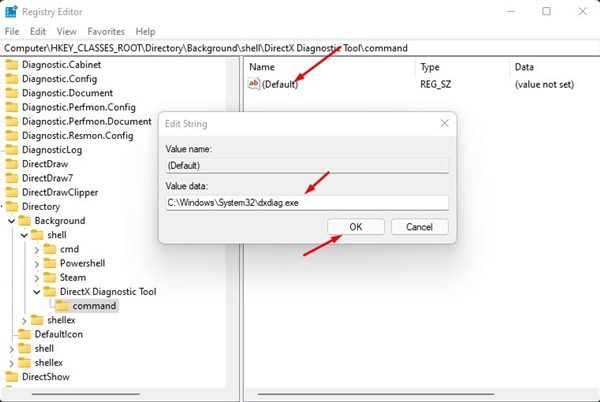
5. You need to name the new key command.
6. On the right double click on the (Default) string, and on the Value Data field, enter C:\Windows\System32\dxdiag.exe. Once done, click on the Ok button.
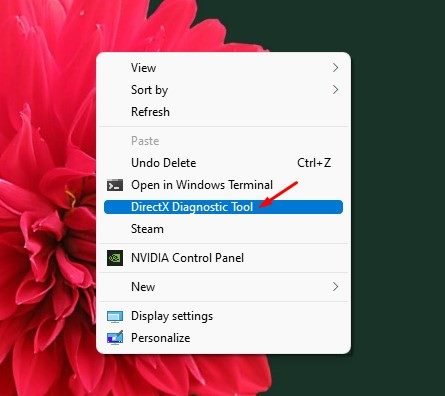
7. Now, right-click anywhere on your desktop; you will find DirectX Diagnostic Tool on the context menu.
That’s it! You are done. This is how you can add DirectX Diagnostic Tool to the right-click menu on Windows 11.
6) Run DirectX Diagnostic Tool via CMD/Powershell
Well, the method to run DirectX Diagnostic tool is the same for both CMD and Powershell. You just need to run both utilities with administrative rights and execute a command.
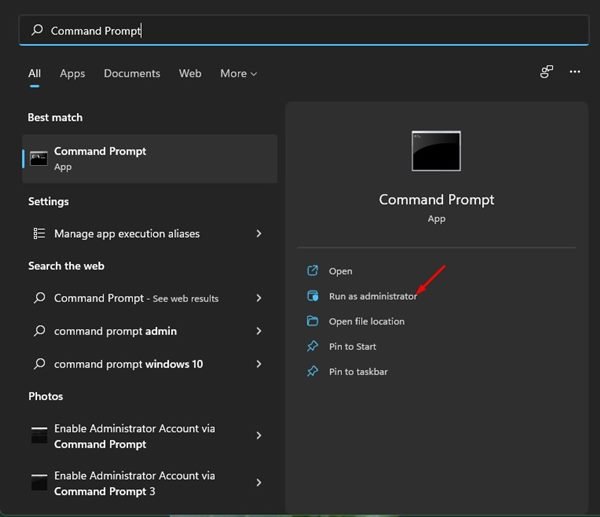
1. First of all, click on the Windows 11 search and type in either CMD or Powershell. Then, right-click on the CMD/Powershell and select Run as administrator.
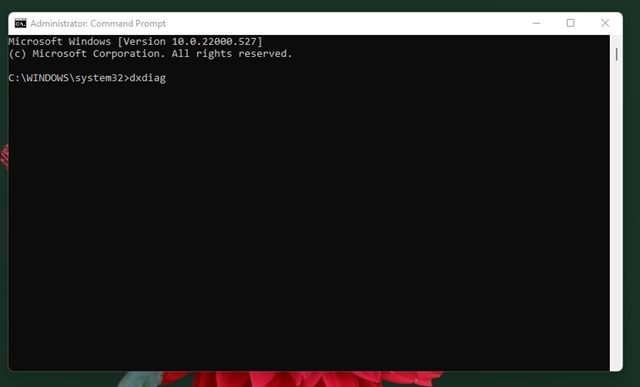
2. On the CMD/Powershell, type in dxdiag and press the Enter button.
3. This will immediately launch the DirectX Diagnostic Tool on your PC.
That’s how easy it is to run DirectX Diagnostic Tool via Command Prompt or Powershell on Windows 11.
Also read: How to Enable Administrator Account on Windows 11
These are the best ways to run the DirectX Diagnostic Tool on the Windows 11 operating system. I hope this article helped you! Please share it with your friends also. If you have any doubts related to this, let us know in the comment box below.
The post How to Open DirectX Diagnostic Tool on Windows 11 (6 Methods) appeared first on TechViral.

