If you have used Windows 10, you might know that the operating system automatically creates and stores a list of every wireless network you have connected to. Windows 11, the new operating system from Microsoft, also creates and saves a list of all WiFi networks, along with their passphrases and other settings.
Windows 11 does this in the background to establish an automatic connection to a saved wireless network when you are within the range. While the ability to automatically connect to a specific WiFi network is great, you might not always need it. In that case, you need to forget a wireless network on Windows 11.
There may be several reasons behind forgetting a WiFi network, like you may not want to connect to a specific network anymore or want to troubleshoot the WiFi connection. Also, if you have several WiFi networks within range and your device automatically connects to the wrong one, forgetting the Wi-Fi network will help.
4 Best Ways to Forget WiFi Network in Windows 11
Whatever might be the reason, it’s pretty easy to forget a known network in Windows 11. Hence, in this article, we will share a step-by-step guide on how to forget a saved WiFi network on Windows 11. We have shared four methods; you can follow any of them. Let’s check out.
1) Forget a WiFi network from the Action Center
Action Center on Windows 11 not only shows you the notifications of the apps & games, but it also lets you control a few essential features like the WiFi networks, Location Settings, Night Light, and more.
You can use the Action center to forget a Wifi network on Windows 11. Here’s what you need to do.
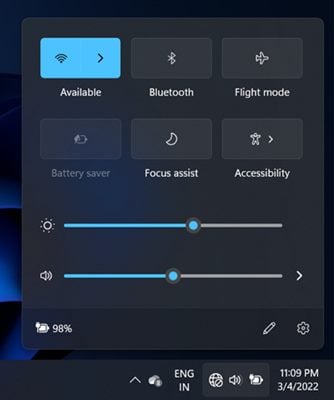
1. First of all, click on the Action Center on your Windows 11. The action center is located on the right side of the taskbar.
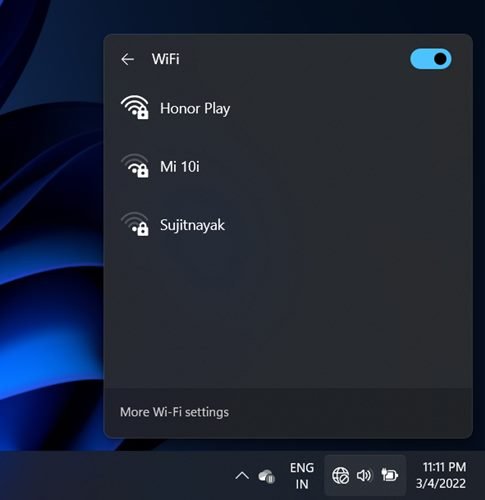
2. Now, make sure that the WiFi is turned on. Next, click on the arrow button next to the WiFi to list all available networks within range.
3. Now, you need to find the WiFi network that you want to forget.
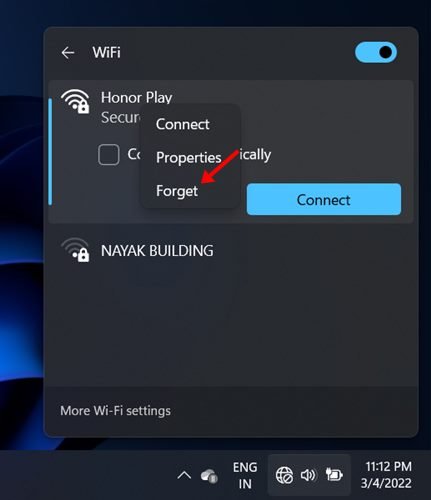
4. Right-click on the WiFi network and select the Forget option.
That’s it! You are done. This is the easiest method to forget a WiFi network on Windows 11. However, please note that the Action Center only shows the network that was available within the range. It doesn’t list all networks.
2) Forget a WiFi Network via Settings
Just like the Action Center, you can rely on Windows 11’s Settings app to forget a WiFi network. It’s pretty easy to forget a WiFi network via Settings on Windows 11. For that, you just need to follow some of the simple steps we have shared below.
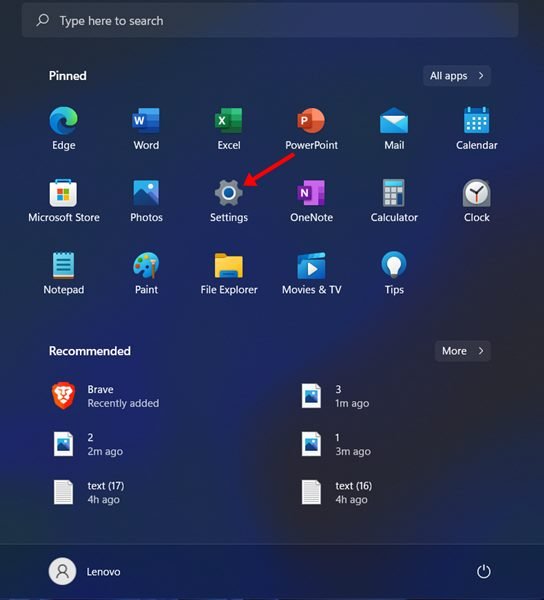
1. First of all, click on the Windows 11 Start button and select Settings.
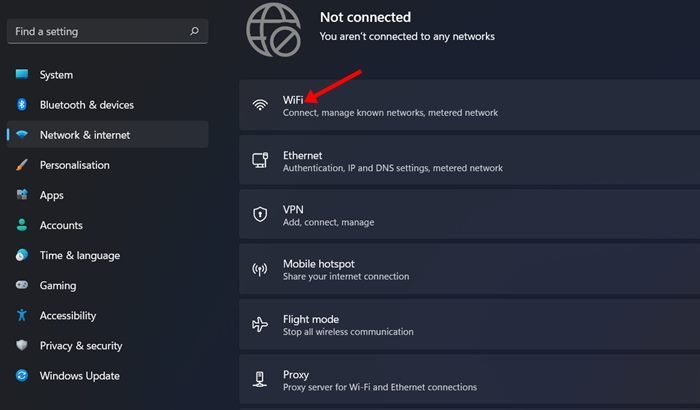
2. On the right pane, click on the Network & Internet option as shown below.
3. Now, under the Network & Internet, click on the WiFi option.
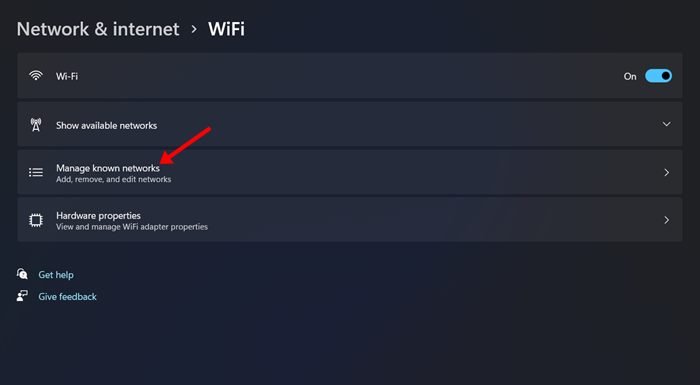
4. On the next screen, click on the Manage Known Networks option, as shown below.
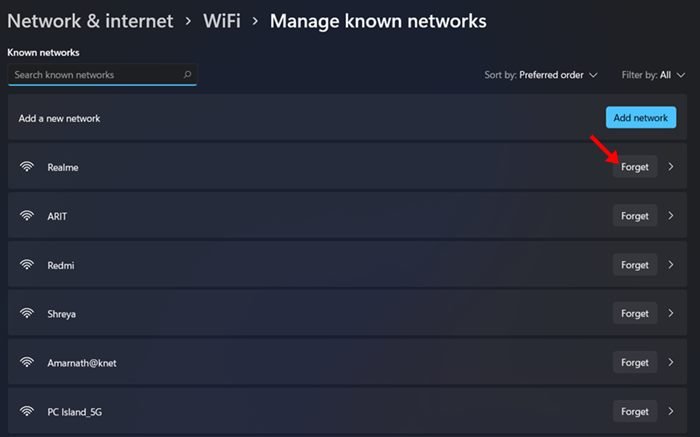
5. Now, you will see a list of all wifi networks saved on your PC. To forget a WiFi network, click on the Forget button next to the Wifi name.
That’s it! You are done. This will forget a WiFi network via Settings on Windows 11 operating system.
3) Forget WiFi Network via Registry Editor
In this method, we will use the Registry Editor to forget a WiFi network. This method is a bit more complicated than all others listed in the article. Here’s what you need to do.
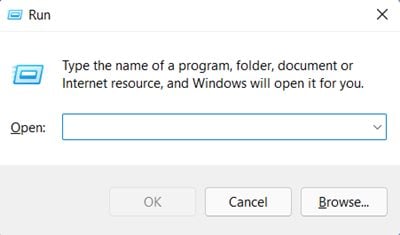
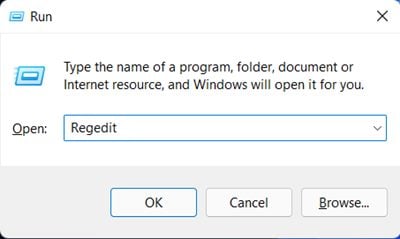
1. First of all, press the Windows Key + R button on your keyboard to open the RUN dialog box.
2. On the RUN dialog box, enter Regedit and hit the Enter button.
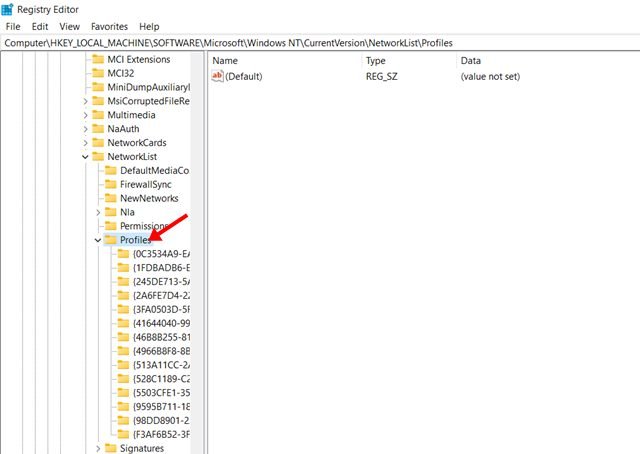
3. This will open the Registry editor. You need to navigate to the following path:
Computer\HKEY_LOCAL_MACHINE\SOFTWARE\Microsoft\Windows NT\CurrentVersion\NetworkList\Profiles
4. On the left pane, you will find many folders. These are the Network profiles saved on your system, but they will be in the form of letters & numbers.
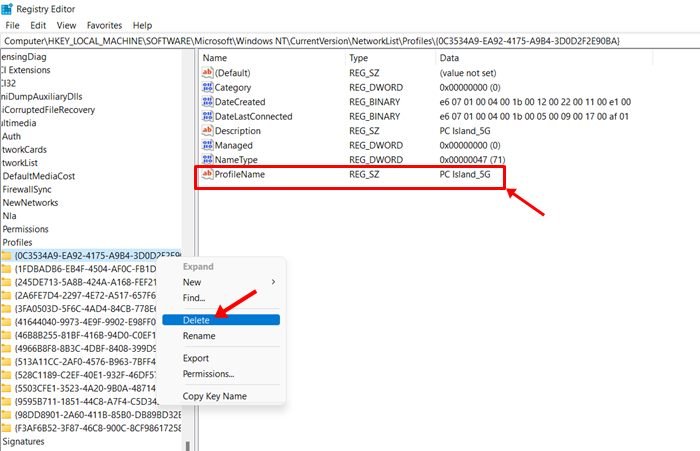
To identify the profile, you need to click on each folder individually and on the right pane, look at the ProfileName key.
5. Once you find the network profile folder, right-click on the folder and select the Delete option.
That’s it! You are done. This is how you can forget a WiFi network on Windows 11 via the Registry editor.
4) Forget a WiFi Network on Windows 11 via Command Prompt
You can even rely on the Command Prompt to forget a WiFi network. To forget a WiFi network, follow some of the simple steps we have shared below.
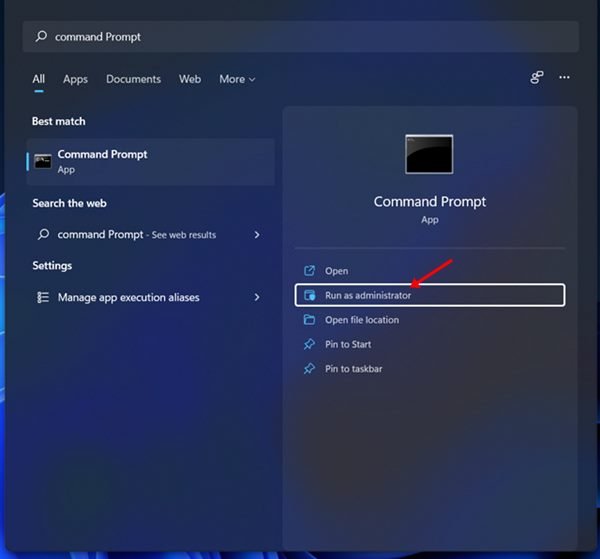
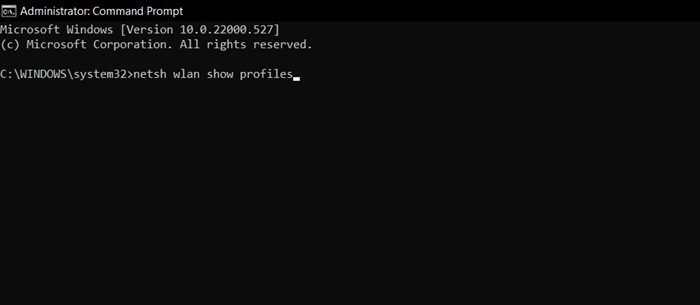
1. First of all, click on the Windows 11 Search and type in Command Prompt. Now, right-click on the Command Prompt and select Run as Administrator.
2. On the Command Prompt Window, execute the command:
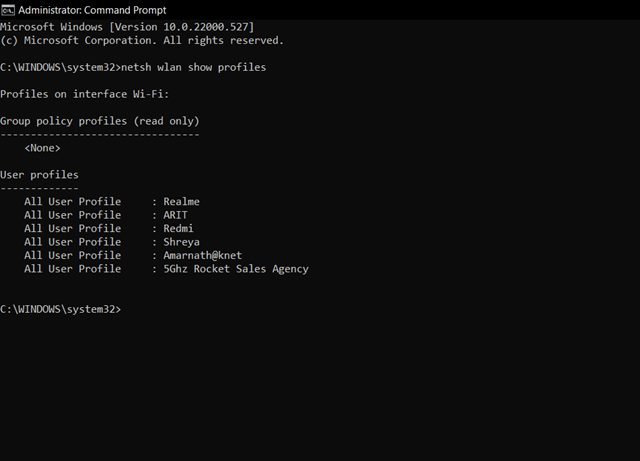
netsh wlan show profiles
3. Now, you will see a list of all saved wireless network profiles.
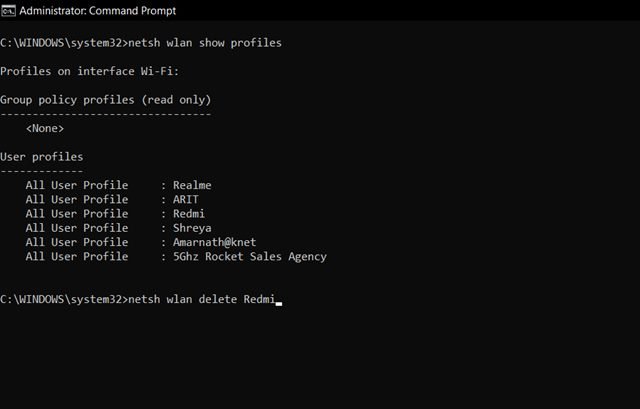
4. To forget a WiFi network, type in the command netsh wlan delete profile name='network name' and hit the Enter button.
Note: Make sure to replace the Network Name with the actual WiFi profile name.
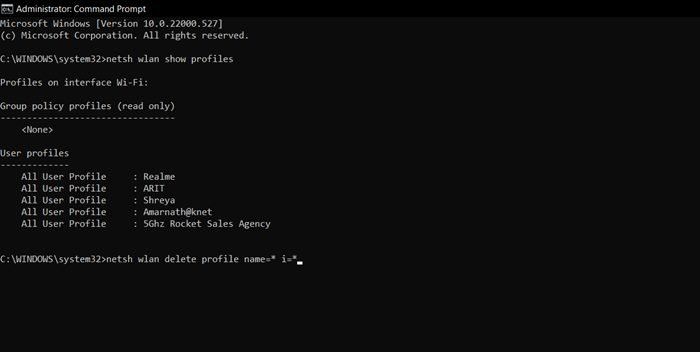
5. If you want to forget all networks saved on your system, you need to execute the command:
netsh wlan delete profile name=* i=*
That’s it! You are done. This will forget the WiFi network name on Windows 11. Compared to the registry one, this method is easier and takes less time.
Also read: How to View WiFi Password in Windows 11
These are the methods you can use to forget wireless network connections in Windows 11. If you don’t want your device to connect to a particular WiFi network, you can forget that network. I hope this article helped you! Please share it with your friends also. If you have any doubts related to this, let us know in the comment box below.
The post How to Forget WiFi Network in Windows 11 (4 Best Methods) appeared first on TechViral.

