If you have used Windows 10, you might know that the operating system displays the time & date in the taskbar. The date is formatted with forwarding slashes and two numbers for the year. When it comes to the time, the taskbar displays time in a 12-hour format (12:00 pm).
Although the default date & time format is totally acceptable, you can change these settings easily. The same thing goes for Windows 11 as well. On Windows 11, you also get the option to use the 24-hour format.
Also Read: How to View WiFi Password in Windows 11
Steps to Change Time & Date Format in Windows 11
So, if you are looking for ways to change the date & time format in Windows 11, you are reading the right guide. In this article, we will share a step-by-step guide on how to change the time format in Windows 11.
1) How to Change the Time Format
Important: Whatever time format you choose, it will appear on the Taskbar at the bottom right corner of the screen.
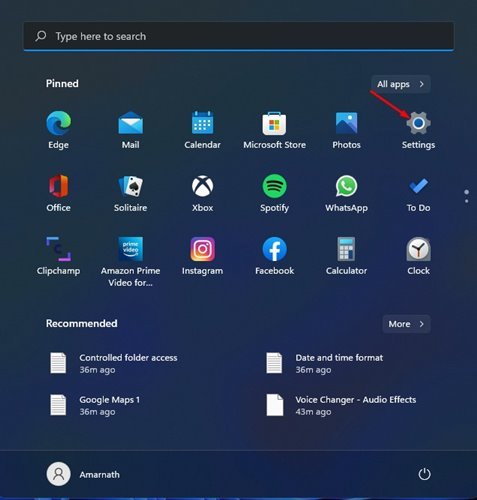
1. First of all, click on the Windows 11 start button and select Settings.
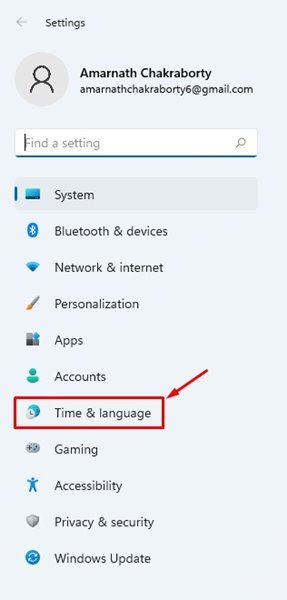
2. On the Settings page, click on the Time & language option.
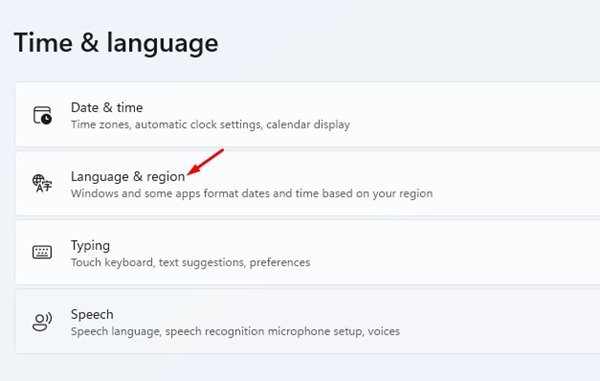
3. Click on the Language & region option on the right pane.
4. Now scroll down and click on the Administrative language settings.
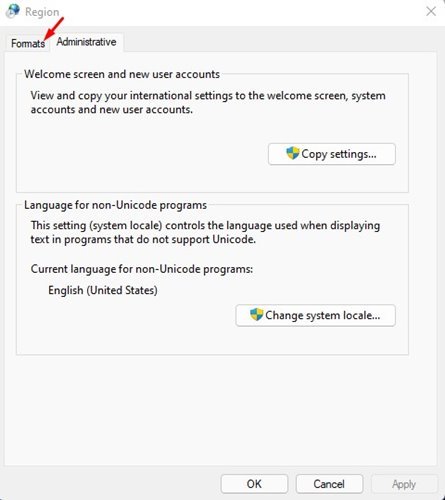
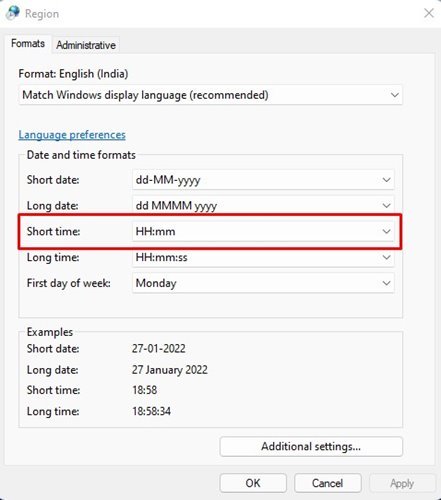
5. On the Region Window, switch to the Formats tab.
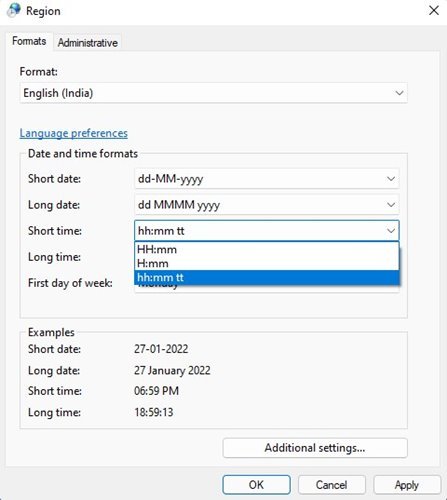
6. Under the Short time, you need to select the time format. If you want to use 24-hour format, select H:mm or HH:mm.
7. If you want to use the 12-hour format, you need to select the hh:mm:tt option.
8. Once done with the changes, click on the Apply button.
2) How to Change the Date Format
Like the time format, you can also change the date format in Windows 11. Here’s what you need to do.
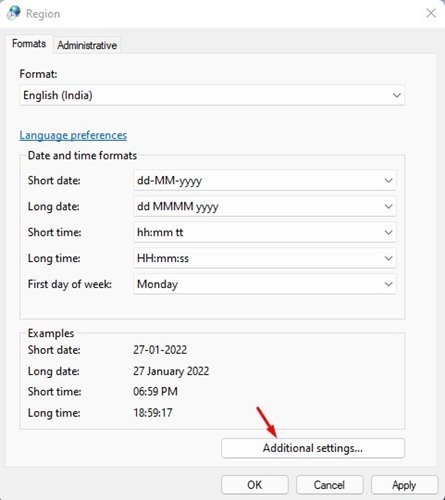
1. On the same page, you need to click on the Additional settings option.
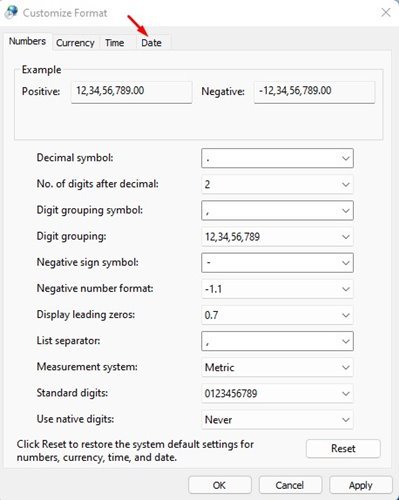
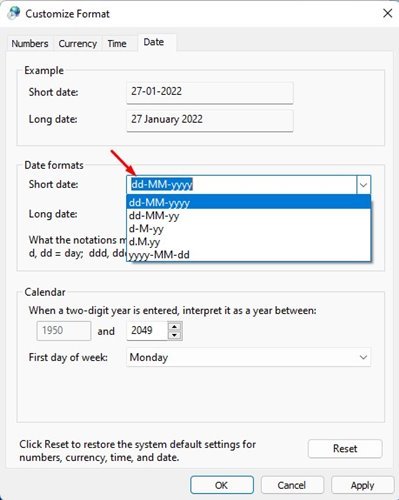
2. On the Customize Format dialog box, switch to the Date tab.
3. Under the Short date, you need to select your preferred date format.
4. Once done with the changes, click on the Apply button.
That’s it! You are done. This is how you can change the time & date format in Windows 11.
Important: There are lots of options in the time & date format in Windows 11. It’s recommended to go through all formats before finalizing one for your PC.
Changing the time & date format in Windows 11 is an easy process. I hope this article helped you! Please share it with your friends also. If you have any doubts related to this, let us know in the comment box below.
The post How to Change Time & Date Format in Windows 11 appeared first on Tech Viral.

