Since Windows 11 is still under testing, users often encounter bugs such as screen flickering, black screens, etc. Recently, a few Windows 11 users complained about no sound on their PCs or laptops.
Users have reported that sound has stopped working on Windows 11. The problem occurs regardless of whether users select the built-in or external speaker. No sound issue is already seen on Windows 10, but it has been resolved.
If you are experiencing no sound problem on the new Windows 11, you need to follow some basic tips. Hence, in this article, we have compiled a list of the best methods to fix no sound issues on Windows 11.
Also Read: 6 Best Ways To Fix Windows 11 Black Screen Issue
List of 10 Best Ways To Fix No Sound Problem in Windows 11
Since the actual cause of no sound is still unknown, we need to rely on some basic troubleshooting tips. So, let’s check out the few best methods to fix no sound on Windows 11 operating system.
1. Check if the Audio is Muted
If your PC/laptop is used by other members of your family, the chances are that they might have reduced the volume level to zero.
So, if the Audio is on mute, it won’t play any sound regardless of whether you are using a soundbar or internal speaker. To unmute the sounds, follow the steps below.
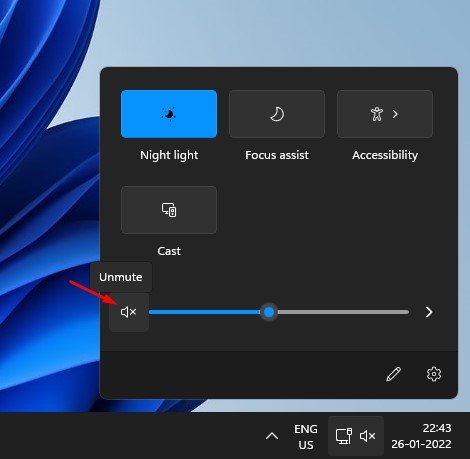
1. Open the Action Center by pressing Windows Key + A button.
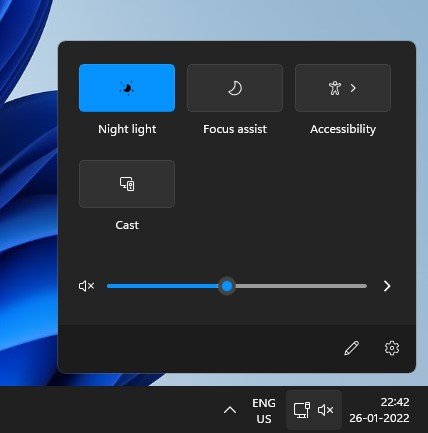
2. On the Action center, click on the Volume icon.
3. Click on the Volume icon behind the volume slider to unmute the sound.
2. Connect the Audio Cable to Correct Port
If you are still not able to hear the sounds even after unmuting the speakers, you need to check the audio cable connection to your PC.
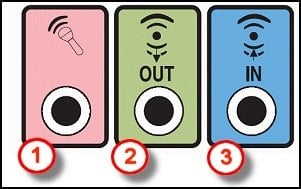
It is common for users to connect the audio cable to the wrong port, resulting in no sound. The green port on your PC’s cabinet is the audio output port, so the audio output jack must be connected there.
3. Select the Correct Audio Source
After inserting the wire to the correct port, you need to choose the right audio source. Follow some simple steps below to select the correct audio source on Windows 11.
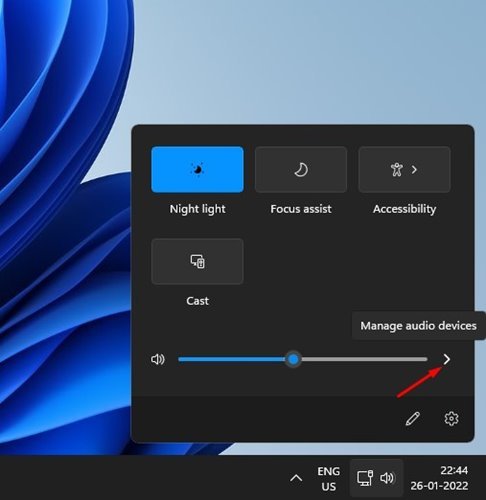
1. First, press the Windows Key + A button to open the Action Center. Then, click on the arrow button next to the volume slider on the Action center.
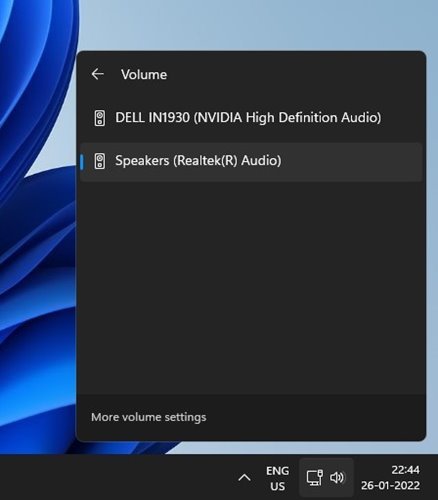
2. Now, you will be able to see all available audio devices. You need to pick the correct audio source to fix the no sound issue.
4. Enable the Playback device
Since Windows 11 is not entirely free from bugs, users might face issues with the playback devices. Sometimes, the playback device gets disabled due to a bug or incorrect settings. Hence, you need to check and enable the correct playback device to fix no sound issue on Windows 11.
1. First of all, press Windows Key + R button to open the RUN dialog box. On the RUN dialog box, enter mmsys.cpl and hit the Enter button.

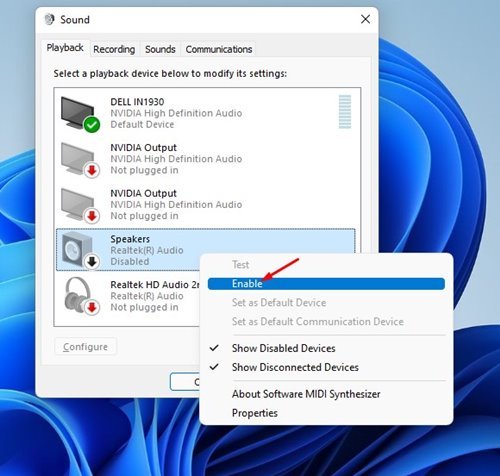
2. This will open the playback devices Windows for the sound output. You need to right-click on the appropriate device and select ‘Enable’
3. To confirm whether the device is actually enabled, you need right click on the playback device and select the ‘Test‘ option.
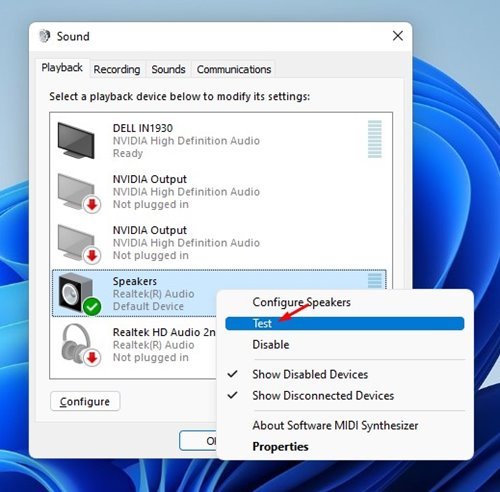
This will play the sound through the speakers or headphones you are using. If the sound plays, the playback device is enabled and working fine.
5. Allow Apps to Use your Sound Device
On Windows 11, you get the option to manually enable apps to use specific playback device. So, if you haven’t granted permission to the apps to use your Audio source, the sound won’t play. Hence, in this method, we will allow apps to use our sound device on Windows 11.
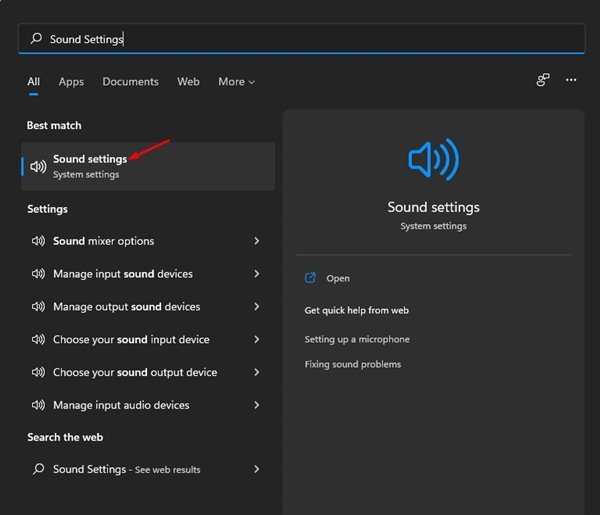
1. First of all, open Windows 11 search and type in ‘Sound Settings’. Open Sound Settings from the list of options.
2. On the Sound Settings page, select the speaker or headphone you are using. Next, click on the Arrow button behind the playback device.
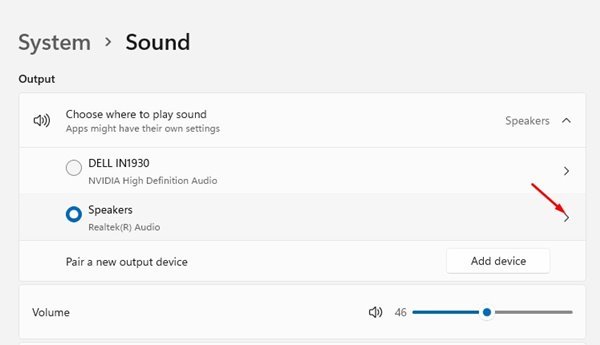
3. Under the General option, you need to click on the Allow option. This will allow apps on your Windows 11 to use this device for audio playback.

4. On the same page, scroll down and disable the ‘Enhance audio’ option.
That’s it! You are done. This will fix no sound issue on Windows 11.
6. Run Windows Audio Troubleshooter
Like Windows 10, Windows 11 also ships with an Audio Troubleshooter that can detect and fix problems related to audio playback. Hence, we will use the Audio Troubleshooter to fix the no sound issue.
1. Open Windows 11 search and type in Sound Settings. Open Sound Settings from the list.
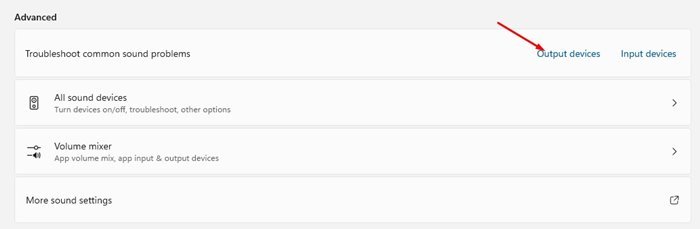
2. Now scroll down and click on the Advanced section.
3. Under the Advanced settings, click on the Output devices behind the Troubleshoot common sound problems option.
4. Now, Windows 11 will run the Audio troubleshooter and will fix the problem.

That’s it! You are done. This is how you can run Audio Troubleshooter on Windows 11 operating system.
7. Update or Reinstall the Audio Driver
Sometimes outdated audio drivers also lead to no sound issue. Hence, you need to check and update the Audio Drivers. Even if the audio drivers were up to date, you need to reinstall the audio drivers.
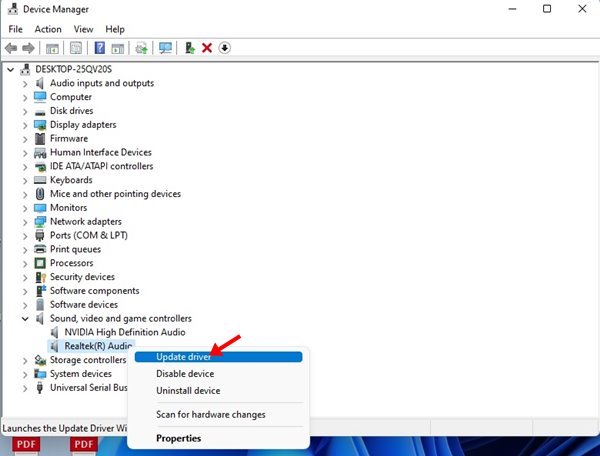
You need to open the Device Manager and expand the Sound, video, and game controllers option to update the driver. Next, right-click on the system sound card and select Update Driver.
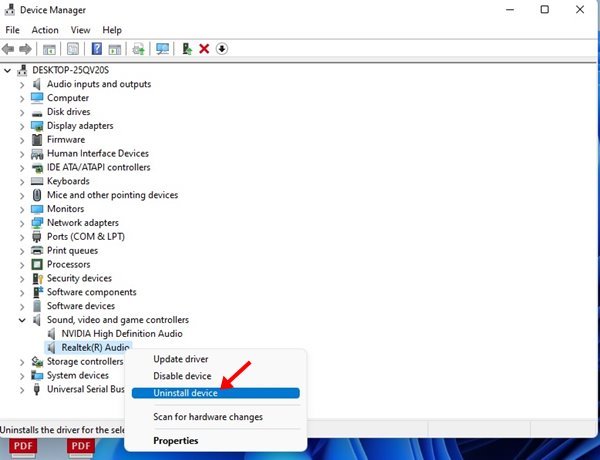
If it’s already updated, then select the ‘Uninstall device’ and restart your computer. After the restart Windows 11 will automatically reinstall the device and its driver.
Alternatively, you can use a third-party driver updater to update your audio drivers.
8. Restart the Windows Audio Services
If you are still facing no sound problem on Windows 11, you need to restart the Windows Audio services. Follow some of the simple steps shared below to restart the Audio Services in Windows 11.
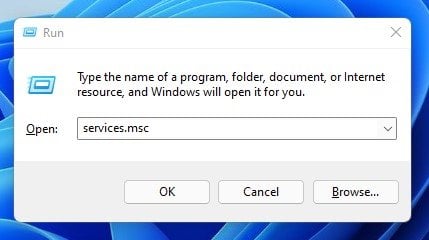
1. First, open the RUN dialog box, type in ‘services.msc‘, and hit the Enter button.
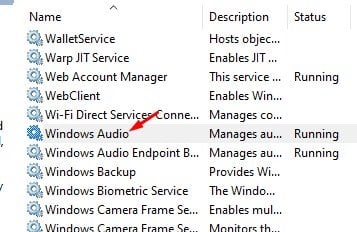
2. This will open the Windows Services page. You need to scroll down and find the Windows Audio Service.
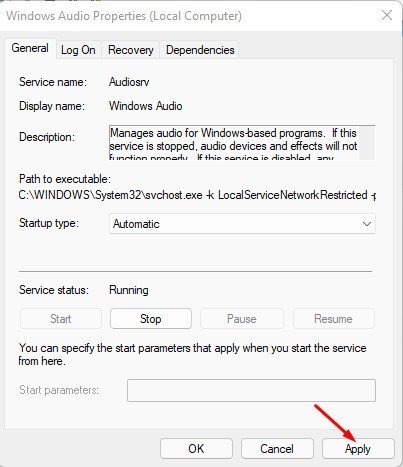
3. Double click on the Windows Audio services and select ‘Automatic‘ under the Startup type. Once done, click on the Start button.
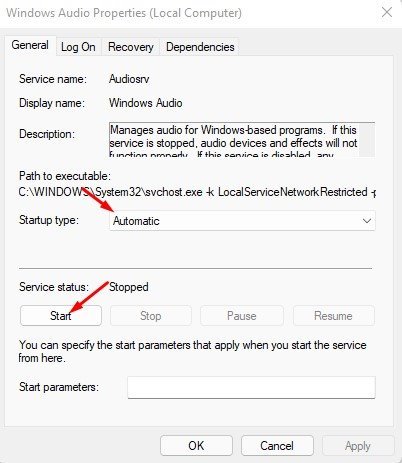
4. After making the changes, click on the Apply button and restart your PC.
This will fix the no sound issue on Windows 11 operating system.
9. Update the Windows 11 Operating system
As we have mentioned, sometimes no sound issue is a result of bugs in the system. Therefore, installing Windows 11 seems the best way to fix such things.
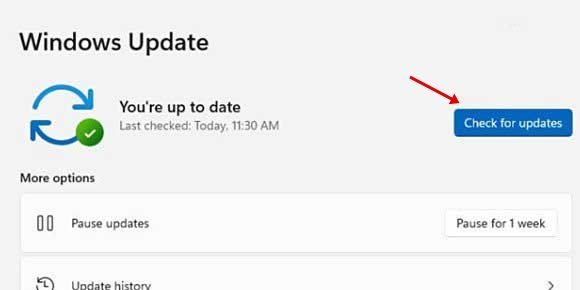
To update Windows 11, open Settings > Windows Update > Check for updates. Windows 11 will now automatically download & install the pending updates.
10. Check the Speakers
If all methods fail to fix the sound problem, you might need to check your speaker. If the speaker has any fault, it won’t play any sound.
So, if possible, try connecting any other speaker to your PC to see if the no sound problem is related to the speaker itself. If you have a faulty speaker, you need to get it fixed or replaced.
We have listed all possible ways to fix no sound issue on Windows 11. I hope this article helped you! Please share it with your friends also. If you have any doubts related to this, let us know in the comment box below.
The post 10 Best Ways To Fix No Sound Problem in Windows 11 appeared first on Tech Viral.
