If you have used Microsoft Edge, you might know that the browser has something known as Vertical Tabs. Vertical tabs on Edge not only looks good; it significantly improve the work efficiency.
Chrome does not come with this feature, but you can get it by installing an extension. It looks like Google Chrome has added a side panel feature that adds bookmarks and a search box to Chrome’s new Read later tab.
The feature is available on the stable build of Google Chrome, but it’s hidden behind a flag. So, if you want to add the Side panel on your Google Chrome browser, you are reading the right guide.
Also read: How to Enable Google Chrome’s Hidden Windows 11 Theme
Steps to Enable the Side Panel in Google Chrome Browser
In this article, we will share a step-by-step guide on how to enable the Side Panel feature on the new Google Chrome browser. So, let’s check out.
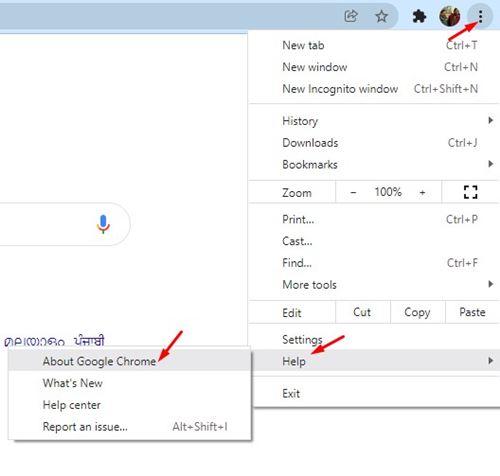
1. First, open the Google Chrome browser, and click on the three dots > Help > About Chrome. You need to update the Chrome browser to the latest version.
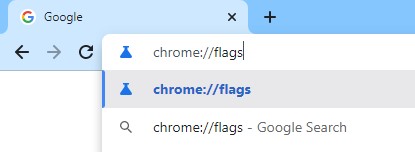
2. Once updated, restart the web browser and head to the chrome://flags page.
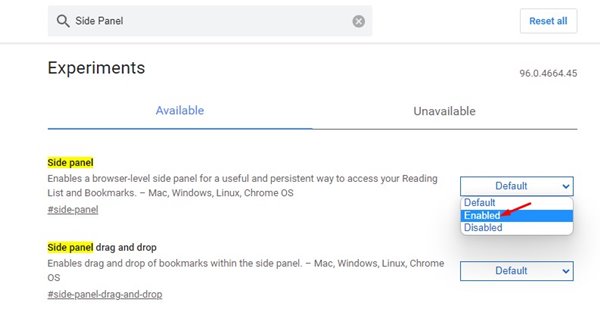
3. On the Chrome flag page, search for Side Panel and hit enter.
4. You need to click on the drop-down menu behind Side Panel and select Enabled.
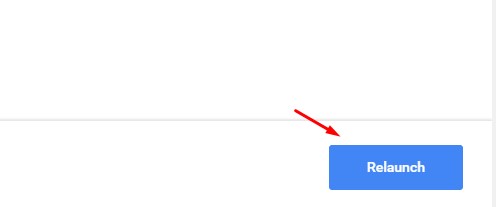
5. Once enabled, click on the Relaunch button to restart the web browser.
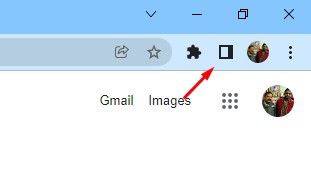
6. After the restart, you will notice a new icon behind the URL bar named ‘Side Bar’
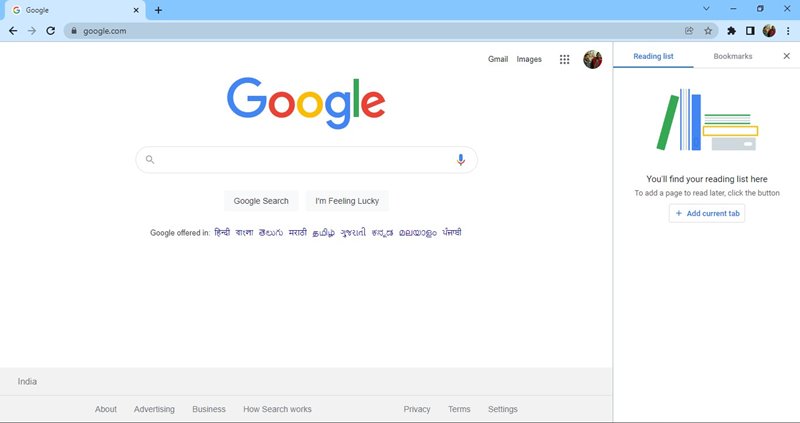
7. Click on the Side Panel icon to enable the right sidebar. You can add content to the reading list and access your bookmarks directly.
That’s it! You are done. This is how you can enable Side Panel in the Google Chrome web browser.
So, this guide is all about how to enable Side Panel in the Google Chrome web browser. I hope this article helped you! Please share it with your friends also. If you have any doubts related to this, let us know in the comment box below.
The post How to Enable the Side Panel in Google Chrome Browser appeared first on TechViral.

