While installing Windows operating system, you were asked to set up an account. You can easily set up a username and password in the Windows installation wizard. However, changing the account name on Windows 11 is not as easy as you expect.
There might be various reasons why one would want to change their account name on Windows 11. For example, the account name might be wrong, it might be misspelled, etc. Also, changing usernames is common when you buy a pre-built laptop from a third-party retail store.
So, if you are looking for ways to change your account name on Windows 11, you are reading the right guide. In this article, we will share a step-by-step guide on changing the account name on Windows 11.
Also read: How to Change Local User Account Password on Windows 11
Steps to Change Your Account Name on Windows 11
Important: We have used Windows 11 to demonstrate the methods. You can implement the same process to change the account name on Windows 10.
1. Changing Windows 11 Account Name from Control Panel
In this method, we will utilize Windows 11’s control panel to change the account name. Follow some of the simple steps given below.
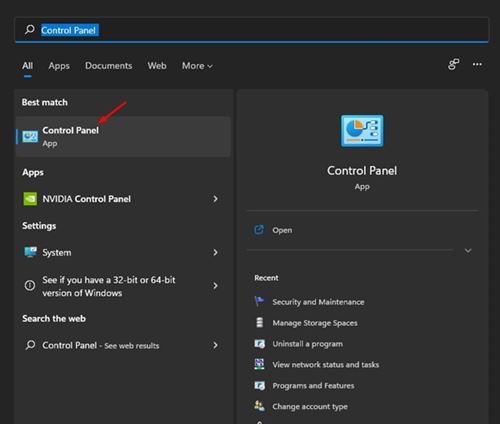
1. First of all, click on the Window search and type in Control Panel. Then, open the Control Panel from the list.
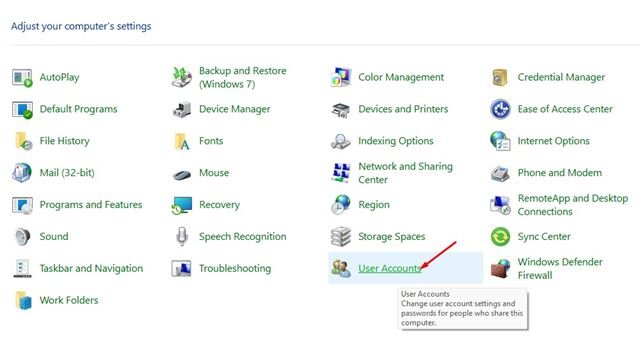
2. On the Control Panel, click on the User Accounts option.
3. Now, select the account that you want to edit.
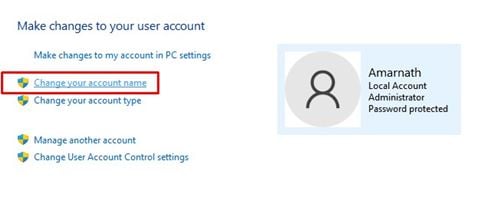
4. On the next screen, click on the Change the Account name link.
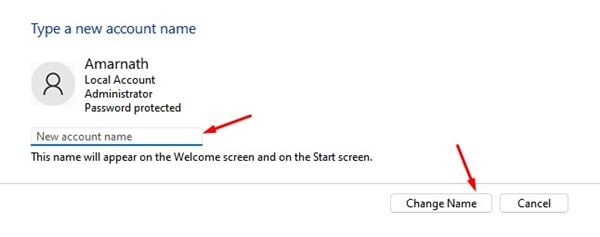
5. On the next screen, type a new account name for your account. Once done, click on the Change name button.
That’s it! You are done. The new name will be reflected in the Welcome screen and on the Start Screen.
2. Changing Account Name on Windows 11 via RUN Command
In this method, we will utilize Windows 11’s RUN dialog box to change the account name. Here are some of the simple steps you need to follow.
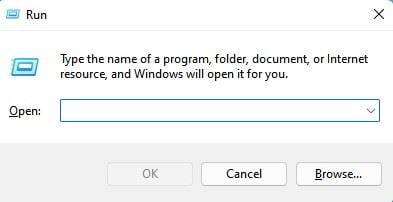
1. First, press the Windows Key + R button to open the RUN dialog box.
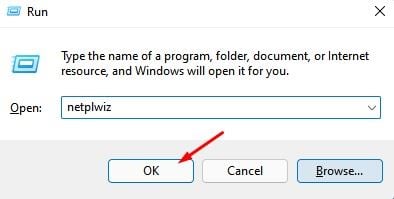
2. On the RUN Dialog box, type in netplwiz and hit the Enter button.
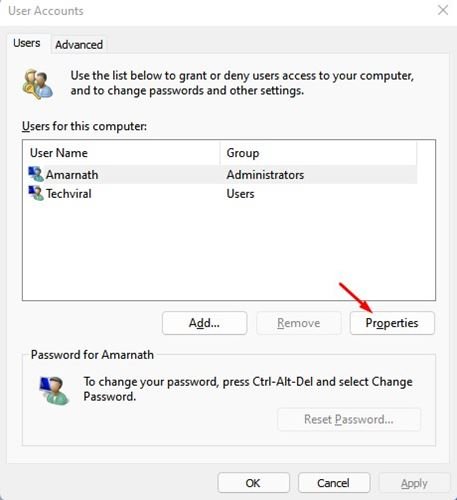
3. Now, select the account whose name you want to change. Once selected, click on the Properties button.
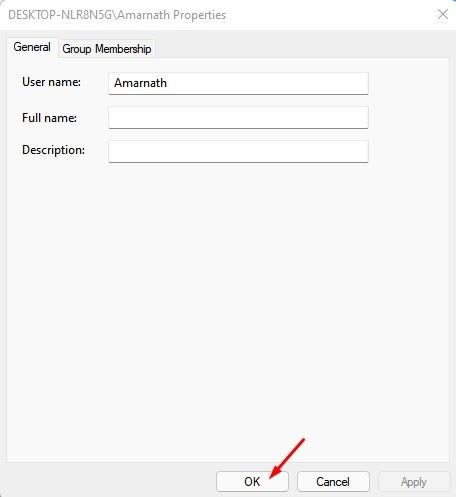
4. Now, under the General tab, type in what you want the name to be in the User name field. Once done, click on the Apply button.
That’s it! You are done. This is how you can change the account name on Windows 11.
So, this guide is all about how to change your account name on Windows 11. I hope this article helped you! Please share it with your friends also. If you have any doubts related to this, let us know in the comment box below.
The post How to Change Your Account Name on Windows 11 appeared first on TechViral.

