A few months ago, Microsoft launched its new desktop operating system – Windows 11. Compared to Windows 10, Windows 11 introduced more features and options. Also, Windows 11 has a more refined look than the existing Windows 10.
What’s more interesting is that Microsoft has tweaked the way updates are delivered to a device. For example, in Windows 11, you get a separate option on the Update page known as ‘Optional Updates’.
The Optional Updates section includes various drivers for the components you have on your device. Also, it includes package updates for third-party software and more. Such updates were moved to the Optional updates because they were not necessary for your system.
Also read: How to Install Google Play Store on Windows 11 (Step-by-step Guide)
Steps to Download & Install Optional Updates in Windows 11
However, if for any reason, if any hardware becomes unresponsive or doesn’t work correctly, you can install these optional updates.
So, in this article, we will share a step-by-step guide on how to download & install Optional updates in Windows 11. Let’s check out.
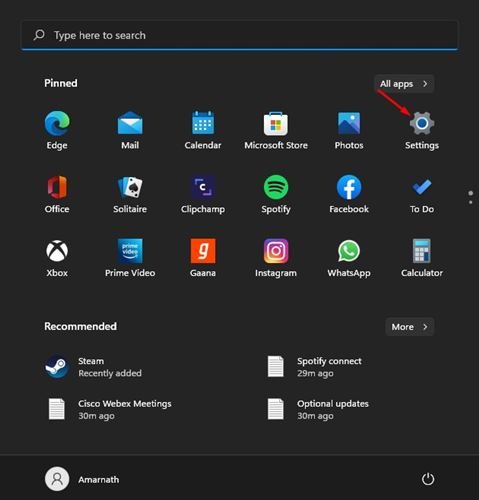
1. First of all, click on the Windows Start button and select Settings.
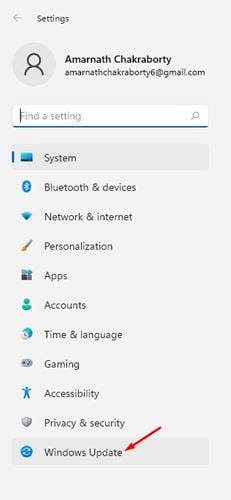
2. On the Settings page, click on the Windows Update option.
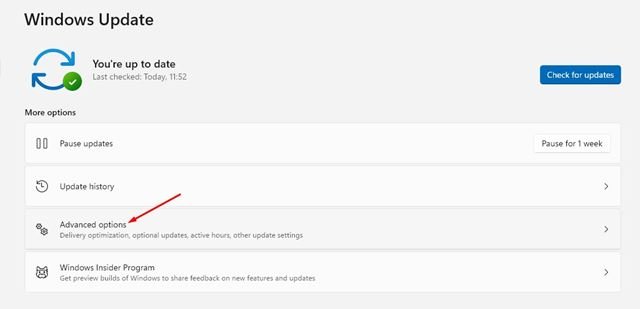
3. Click on the Advanced options on the right pane, as shown in the screenshot below.
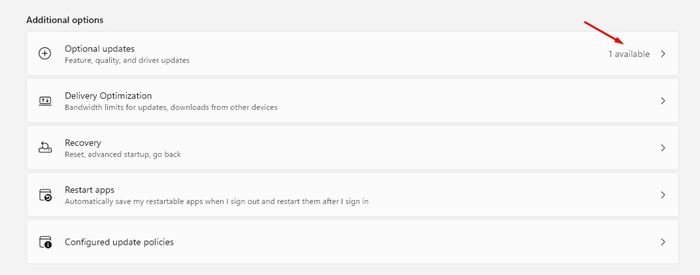
4. On the next screen, click on the Optional Updates option.
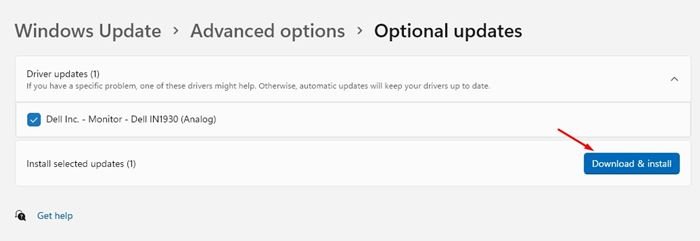
5. Now, select the update you want to download & install.
6. Once selected, click on the Download & Install button as shown below.
7. After installing the optional updates, click on the Restart Now button to restart the computer.
That’s it! You are done. This is how you can download & install optional updates in Windows 11.
So, this guide is all about how to download & install Optional updates in Windows 11. I hope this article helped you! Please share it with your friends also. If you have any doubts related to this, let us know in the comment box below.
The post How to Download & Install Optional Updates in Windows 11 appeared first on TechViral.

