While there are hundreds of cloud storage options available for storing photos & videos, it was the Google Photos that we use the most. Google Photos comes built-in on Android smartphones, and it automatically uploads your photos to Google’s cloud server.
If you are an Android user and depend on the Google Photos app to manage your photos and videos, you might know that the app allows you to create albums. Creating albums on Google Photos is easy, and once you create an album and store photos in it, Google Photos will automatically choose an album cover.
The process is automatic and is meant for those who don’t want to customize Google Photos album manually. However, if you want to customize your Google Photos album, you can change the Cover photo in easy steps. Hence, if you are interested in changing the cover of your Google Photos album, you have landed on the right page.
Steps to Change the Cover of Your Google Photos Albums
In this article, we will share a step-by-step guide on how to change the cover of your Google Photos Albums. The steps will be straightforward; follow them as we have mentioned. So, let’s get started.
Set Custom Album Cover in Google Photos
You can easily change the album cover of your Google Photos albums on both Android & iOS. We have used an Android device to demonstrate the steps; the steps were almost the same for iOS.
1. First, open the Google Photos app on your Android device.
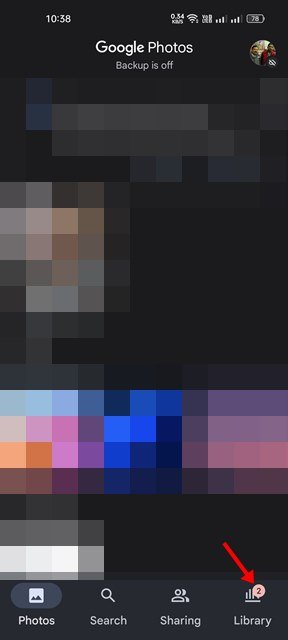
2. Next, tap on the Library icon as shown in the screenshot below.
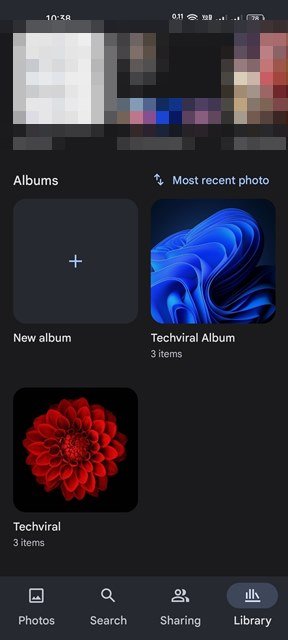
3. Now, you need to find the album you want to change the cover photo. Tap on the album to open it.
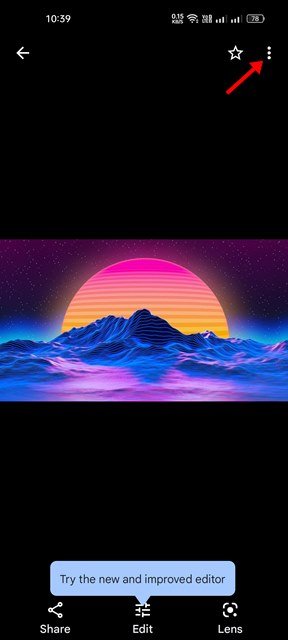
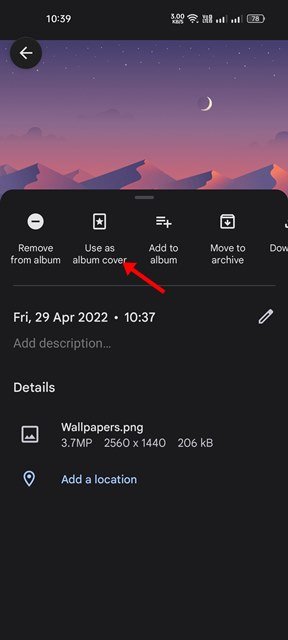
4. Now, you need to select the image you want to use as an album cover. Open the photo and tap on the three dots as shown below.
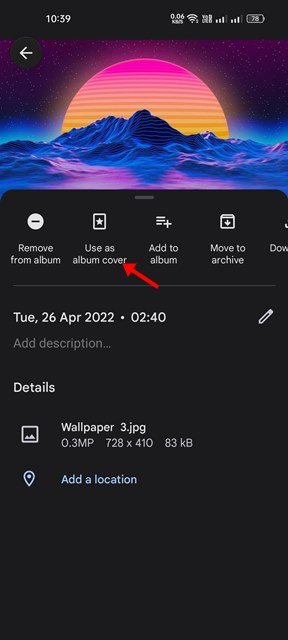
5. From the menu that pops up, tap on the Use as album cover option.
That’s it! You are done. This is how you can change the Cover of your Google Photos album on Android.
Set an image as a cover photo that is not a part of the Album
If you wish to place an image as a cover photo that is not a part of the Album, you need to move the picture to the album first. Here’s how to transfer pictures in between albums in Google Photos.
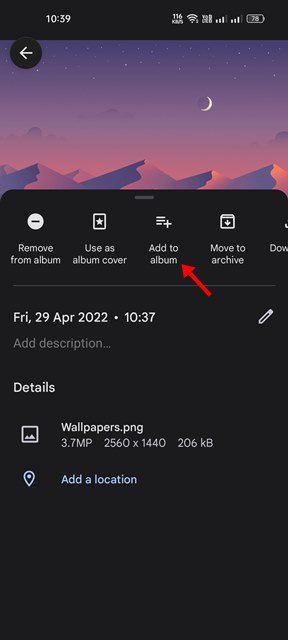
1. First, open the image you want to move in the Google Photos. Next, tap on the three dots as shown below.
2. From the menu that appears tap on the Add to album option.
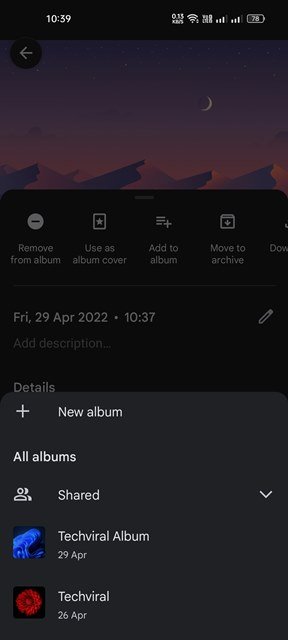
3. Now select the album where you want to move the photo. This will move the photo to your selected album.
4. Once moved, you need to follow the above steps to set an image as your album cover on the Google Photos album.
So, this is how you can change the Cover of your Google Photos albums on Android. Apart from changing the cover Photo, Google Photos also allows you to change the album name, tweak time and location, etc.
The post How to Change the Cover of Your Google Photos Albums appeared first on Tech Viral.


