If you have been using Windows operating system, you are likely to be aware of the Local Group Policy Editor. If you are not, Local Group Policy Editor is a setting that allows you to manage different types of Group Policies in the Windows operating system. Group policies serve as a way to manage different types of settings and configurations of the operating system in bulk.
In short and simple words, you can manage different types of system configurations and settings via the Local Group Policy Editor. The Local Group Policy editor is mainly used by the network administrators to enforce rules or settings on a computer within the network.
You can also manually enable or disable many system settings via the Local Group Policy editor on Windows 11. Local Group Policy Editor is a powerful tool, and it can invite many problems if it lands in the wrong hands.
Regular Windows users often make many changes to the Local Group Policy without any prior knowledge and end up inviting problems. Hence, if you just made changes to the Local Group Policy and encountered problems, you may like to revert your action.
Steps to Reset Local Group Policy Settings to Default on Windows 11
Since it’s not easy to remember each and every setting you modified on the Local Group Policy, it’s best to reset the Local Group Policy Settings on Windows 11. Hence, in this article, we will share a step-by-step guide on how to reset the Local Group Policy Settings on Windows 11. Let’s check out.
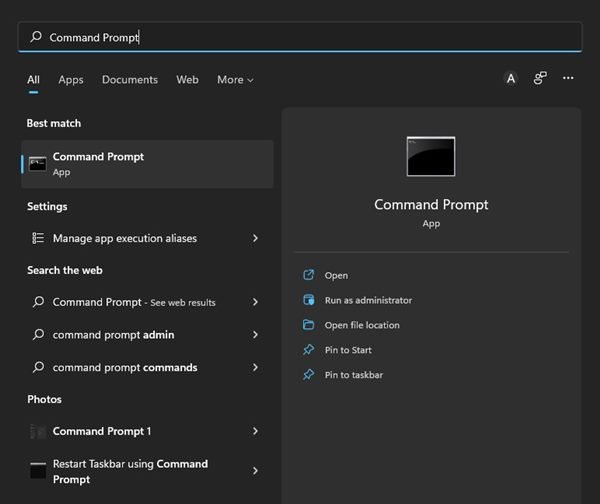
1. First of all, click on the Windows 11 search and type in Command Prompt.
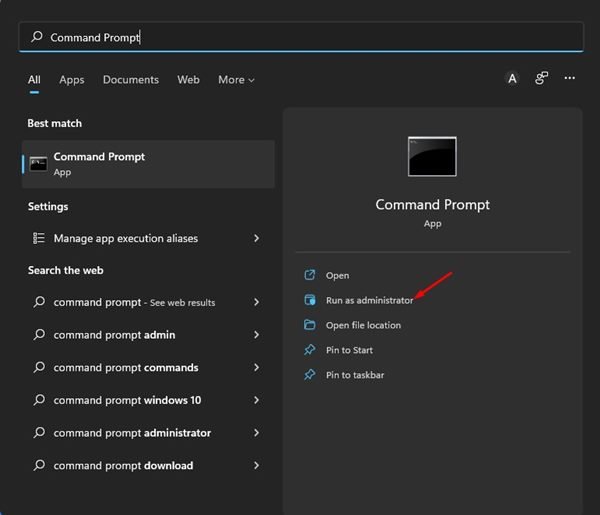
2. Next, right-click on the Command Prompt and select the Run as Administrator option.
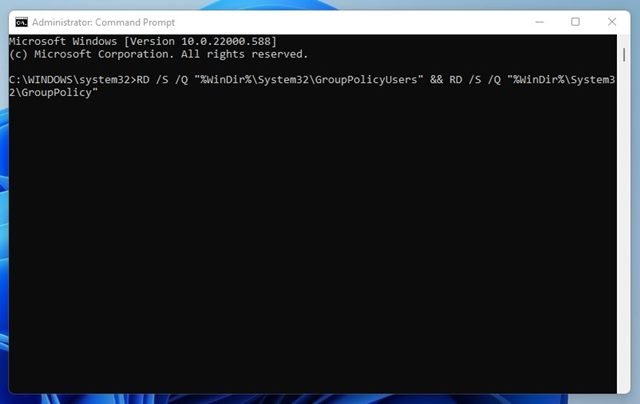
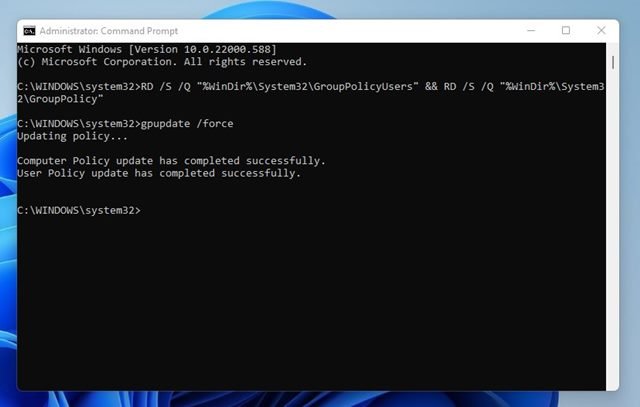
3. On the Command Prompt Window, copy & paste the command shared below and hit the Enter button.
RD /S /Q "%WinDir%\System32\GroupPolicyUsers" && RD /S /Q "%WinDir%\System32\GroupPolicy"
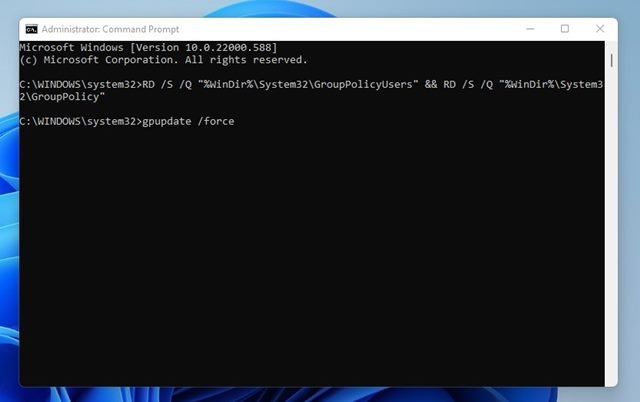
4. After executing the command, you need to copy & paste the given command and press the Enter button on your keyboard.
gpupdate /force
5. Now, you will see a success message that reads, “Computer Policy update has completed successfully. User Policy update has completed successfully”
That’s it! You are done. This will reset the Local Group Policy Settings on your new Windows 11 computer.
It’s pretty easy to reset the Local Group Policy Settings on Windows 11 operating system. However, only reset the Group Policy settings when there’s really a need. I hope this article helped you! Please share it with your friends also. If you have any doubts related to this, let us know in the comment box below.
The post How to Reset Local Group Policy Settings to Default on Windows 11 appeared first on TechViral.

