Both Windows 10 and Windows 11 operating system ships with a Firewall system. The firewall system of Windows is known as Windows Defender Firewall, and it’s a very powerful utility.
The Windows Defender Firewall is turned on by default on Windows 10/11, but users can manually configure it as needed. On Techviral, we have already shared a working guide on configuring a firewall to block internet access to the app.
In this article, we will share another best Windows Firewall trick that will let you block websites. You don’t need to install any browser extensions or edit your system’s host file to block a website.
Steps to Block Websites using Windows Firewall in Windows 11
You just need to create a simple firewall rule to block distracting websites. Below, we have shared a step-by-step guide on blocking websites using Windows Firewall. Let’s check out.
1) Find the IP Address of the Website
The first step includes finding the IP Address of the sites you want to block. For example, if you want to block Facebook, you need to find the IP Address of Facebook.
It’s pretty easy to find the IP Address of the website. For that, you need to use online websites like IPVOID. Here’s what you need to do.
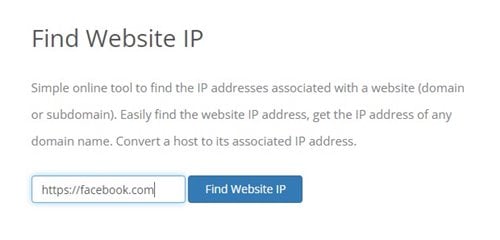
1. First of all, visit IPVOID from your web browser.
2. Next, enter the website name on the text field and click on the Find Website IP button.
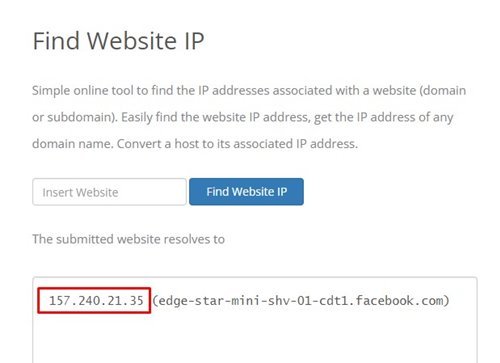
3. The site will list the IP Address. You need to note down the IP address.
2) Creating a Firewall Rule to Block Websites
Once you get the IP Address, you need to create a Firewall rule to block the websites. Here are some of the simple steps you need to follow.
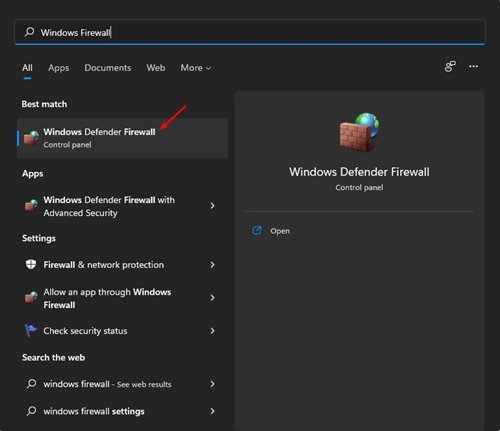
1. First of all, open the Windows 11 search and type in Windows Firewall. Open Windows Firewall from the list.
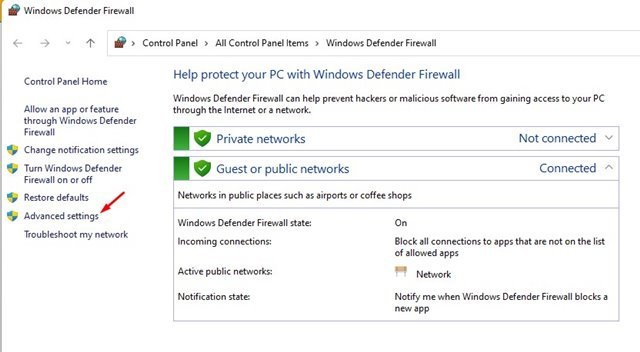
2. On the Windows Defender Firewall, click on the Advanced Settings option.
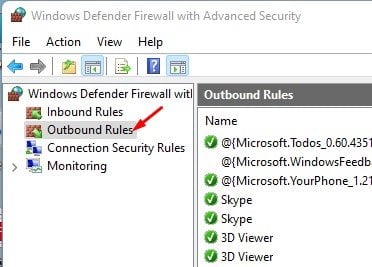
3. On the left pane, click on the Outbound Rules.
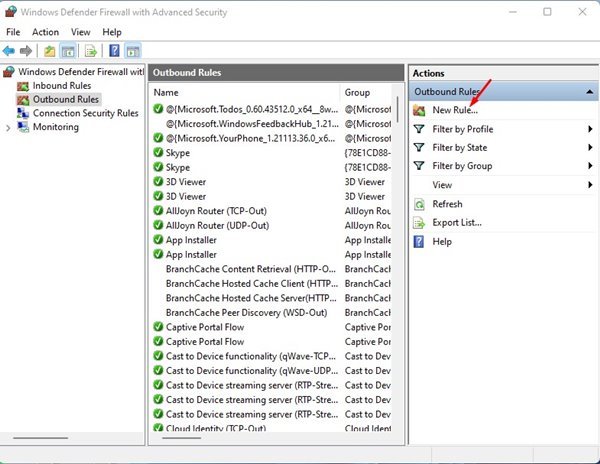
4. On the right pane, click on the New Rule button as shown below.
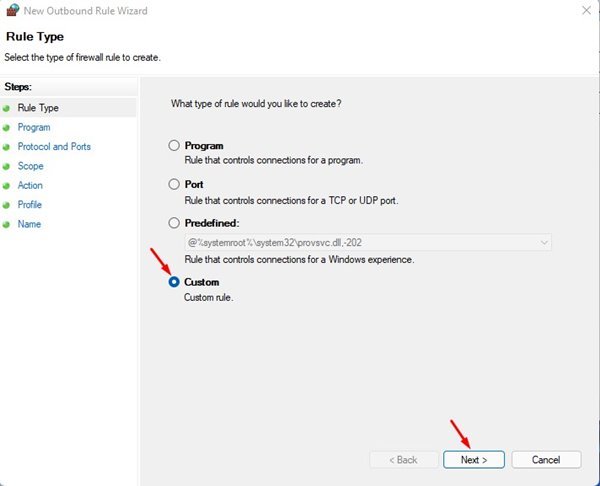
5. On the Rule type pop-up, select Custom and click on the Next button.
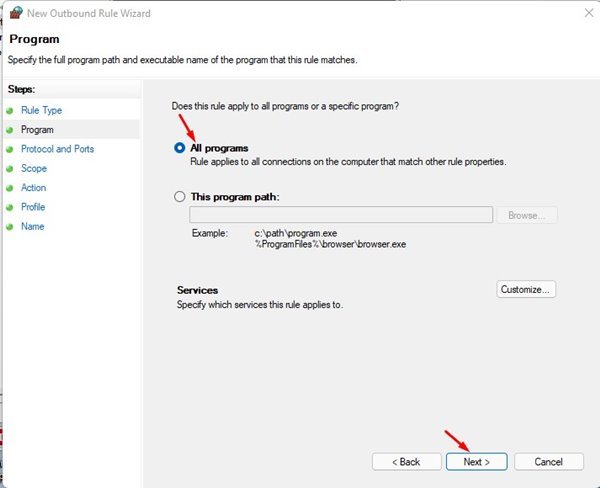
6. Select All programs and click on the Next button on the next page.
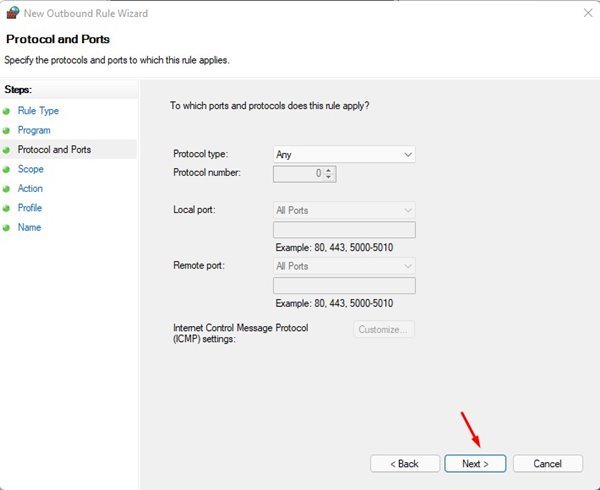
7. Don’t make any changes to the Protocol and Ports option. Just click on the Next button.
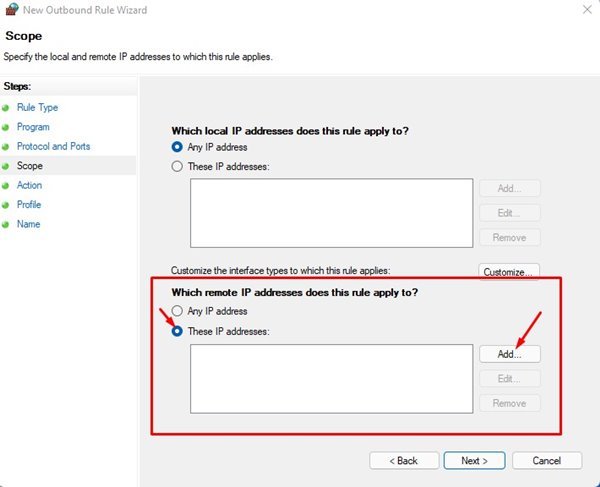
8. On the Remote IP Addresses field, select the ‘These IP Addresses’ checkbox.
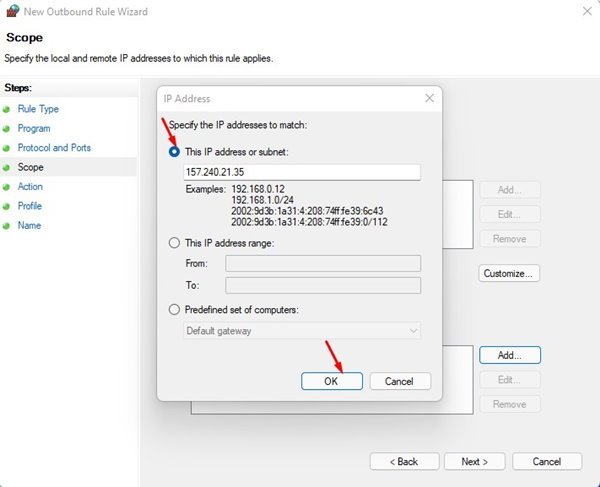
9. Now click on the Add button and add the IP Address you have copied. You need to enter every IP Address. Once done, click on the Next button.
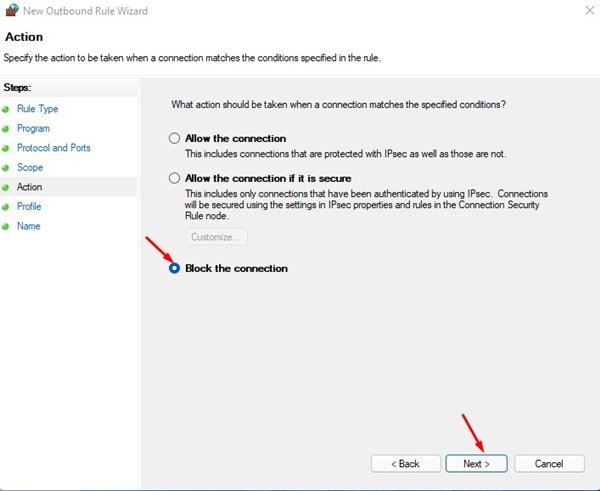
10. On the Action page, select Block the Connection and click on the Next button.
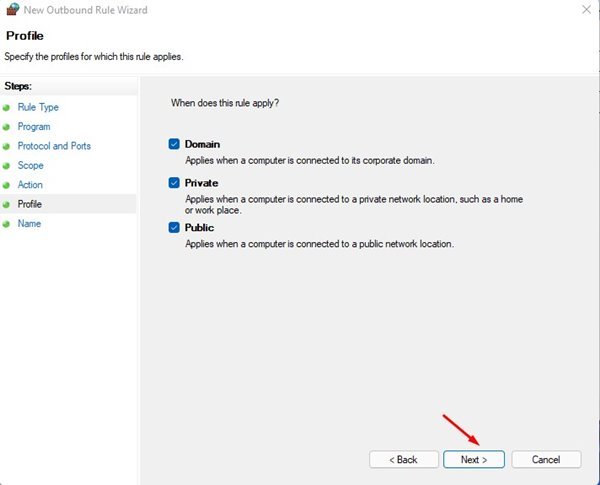
11. On the Profile page, select all three options and click on the Next button.
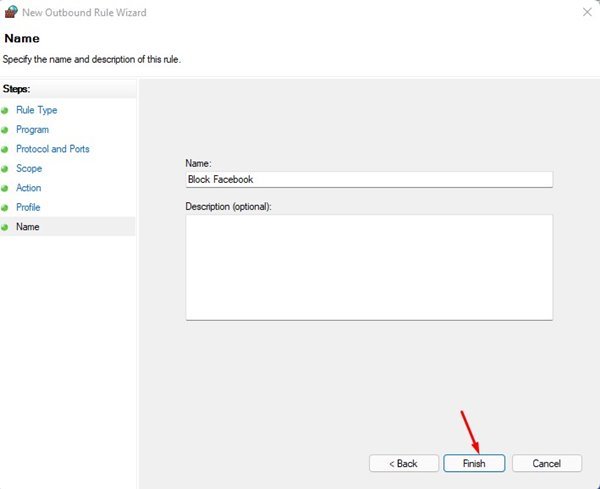
12. Finally, enter the name & description of the new rule and click on the Finish button.
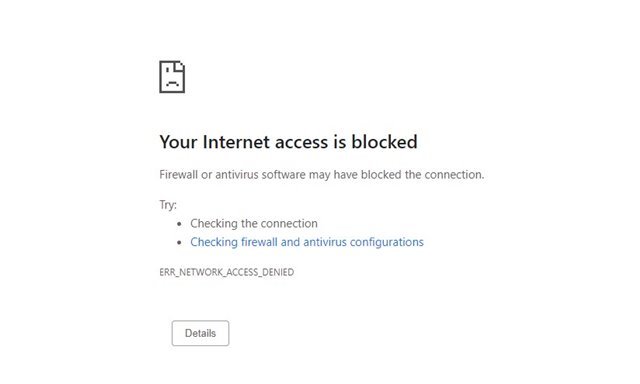
That’s it! You are done. If you try to access the blocked website, you will see a page like this.
How to Disable the Rule?
It’s pretty easy to disable the rule on Windows Defender Firewall. For that, you just need to follow the simple steps shared below.
1. Open Windows Defender Firewall and click on the Advanced Settings option.
2. Select Outbound Rules on the left pane.
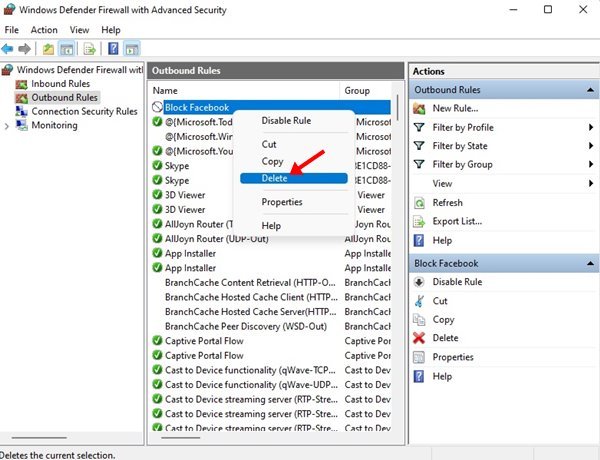
3. On the Right pane, right-click on the Rule and select the ‘Disable Rule’ option.
That’s it! You are done. This will disable the rule. Now you will be able to access the blocked websites.
The process might look lengthy, but it’s easy to follow. I hope this article helped you! Please share it with your friends also. If you have any doubts related to this, let us know in the comment box below.
The post How to Block Websites using Firewall on Windows 11 appeared first on Tech Viral.

