
As a user of the Windows operating system, you might be familiar with the built-in firewall system. Windows Defender Firewall is a built-in security program in Windows 11.
Windows Firewall is a powerful utility, but many people don’t know how to use it. With Windows Defender Firewall, you can stop any program from accessing the internet. For example, if you don’t want Spotify to use the internet, you need to block it from accessing the internet from the Windows Firewall.
Also read: How to View WiFi Password in Windows 11
Steps to Block Internet Access to Apps in Windows 11
It’s pretty easy to block apps from Accessing the internet on Windows 11, but you need to configure the Windows Defender Firewall settings.
Hence, this article will share a step-by-step guide on blocking an app’s internet access using the Windows Defender firewall. Let’s check out.
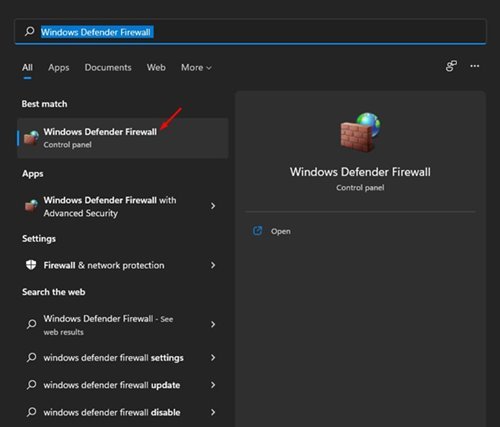
1. First of all, click on the Windows 11 search, type in Windows Defender Firewall, and open it from the list of options.
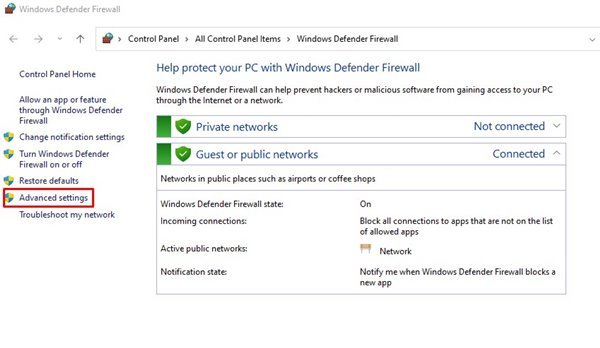
2. On the left pane, click on the Advanced Settings option, as shown in the screenshot.
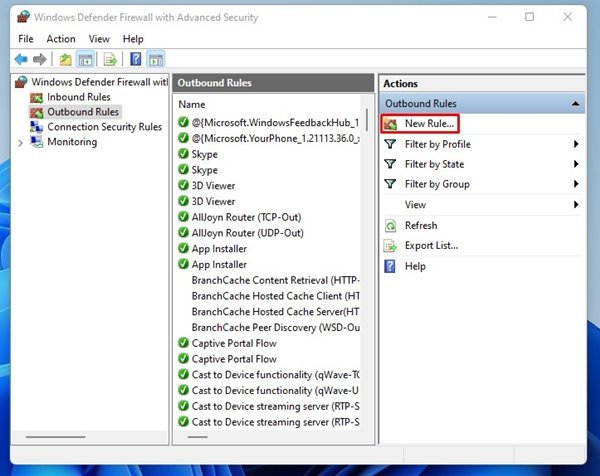
3. Now, on the left pane, select the Outbound Rules. On the right, click on the New Rule option.

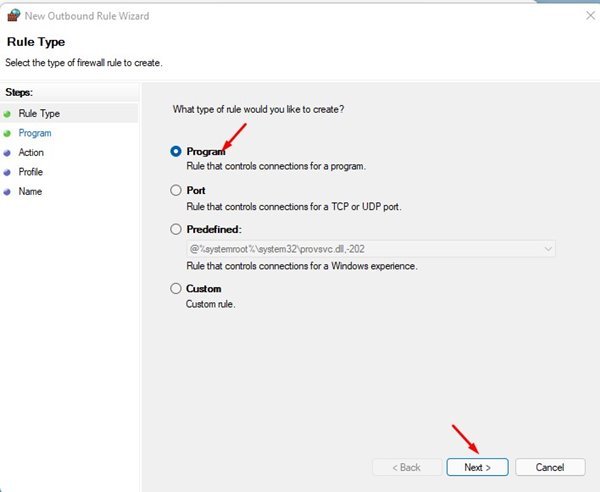
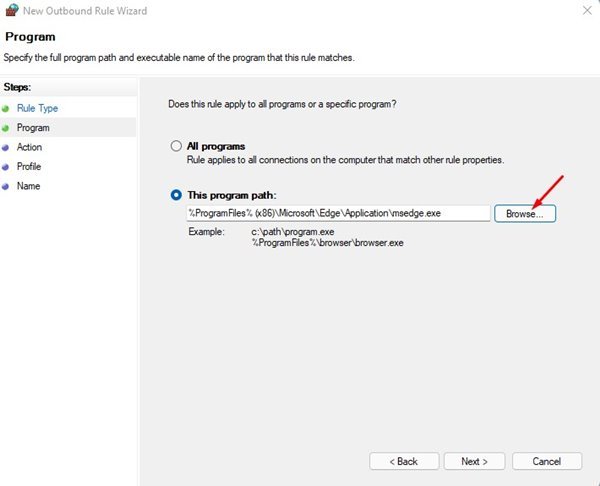
4. On the New Outbound Rule Wizard, select Program and click on the Next button.
5. Select the ‘This program path’ option and locate the .exe file of the program you want to block from accessing the internet.
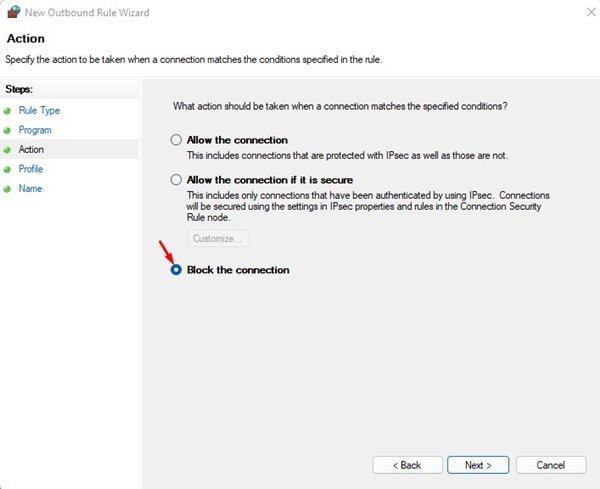
6. Select the ‘Block the connection’ option and click on the Next button on the next window.
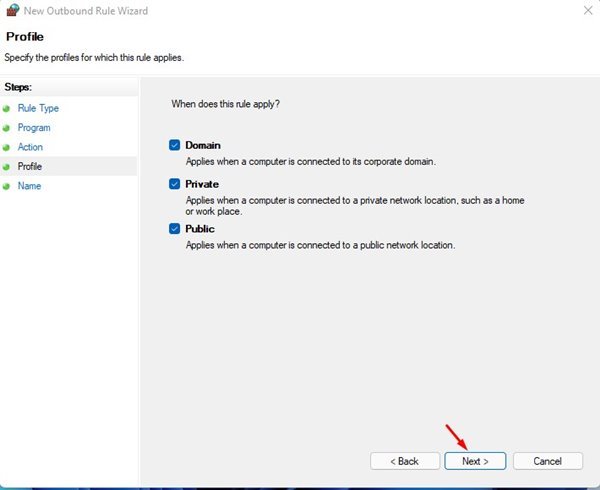
7. On the Profile, you need to select all three options – Domain, Private, Public. Once done, click on the Next button.
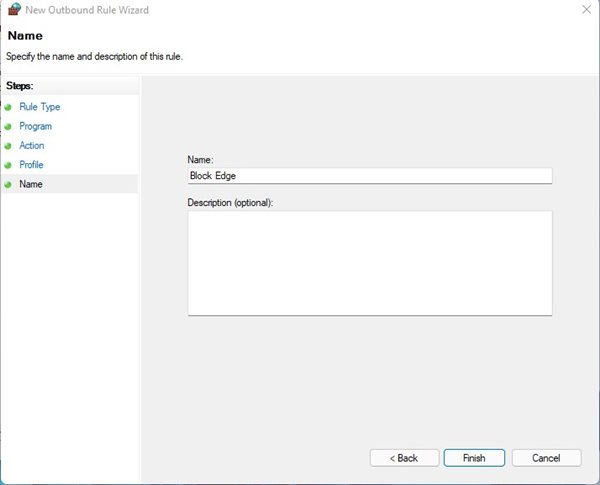
8. On the Name Window, you need to name the new firewall rule like Block Edge or something else. Once done, click on the Finish button.
That’s it! You are done. Now your app shouldn’t be able to access the internet.
How to Disable The Firewall Rule to Block Apps
If you want to disable an app’s internet blocking rule, you need to implement some of the simple steps shared below. Here’s how to disable an app’s internet blocking rule on Windows 11.
1. First of all, click on the Windows 11 start menu and type in Windows Defender Firewall. Next, open the Windows Defender Firewall from the list.
2. On the Firewall page, click on the Advanced Settings option.
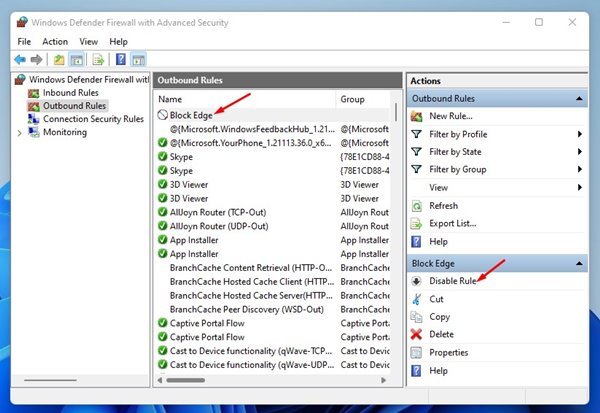
3. On the Windows Defender Firewall with Advanced Security window, select the Outbound Rules.
4. Find the name of the rule you have created. Right-click on the rule and select Disable Rule. You can even click on the Disable Rule button on the right pane.
5. You can even delete the rule. For that, you need to click on the Delete button on the right pane.

That’s it! You are done. Now your app will regain access to the internet.
It’s pretty easy to block and unblock internet access to apps in Windows 11. I hope this article helped you! Please share it with your friends also. If you have any doubts related to this, let us know in the comment box below.
The post How to Block Internet Access to Apps in Windows 11 appeared first on Tech Viral.
