Right now, most of the web browsers flag websites using HTTP as ‘Not Secure’. This thing is done to let users know that any middle-man can tamper with the webpage they are viewing.
If a site is insecure, the sensitive information that you enter can be viewed/tampered with by any middle-man. To deal with security-related issues, tech companies like Google, Microsoft, etc., were now pushing DNS Over HTTPS on their applications and web services.
Basically, DNS over HTTPS is a security protocol that forces your system to make a secure, encrypted connection to your DNS server. Before Windows 11, users need to manually enable the DNS over HTTPS feature on their web browser.
However, on Windows 11, you get a system-wide DNS over HTTPS. That simply means, if you turn on the DNS over HTTPS on your Windows 11, all your apps and programs will use DoH to talk to the DNS.
Also read: How to Set Up a Metered Connection in Windows 11
Steps to Turn On DNS Over HTTPS on Windows 11
So, in this article, we will share a step-by-step guide on enabling DNS over HTTPS on Windows 11. Let’s check out.
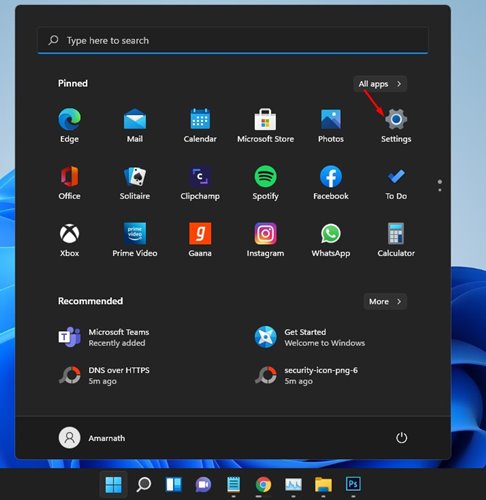
1. First of all, click on the Windows 11 Start menu and select Settings.
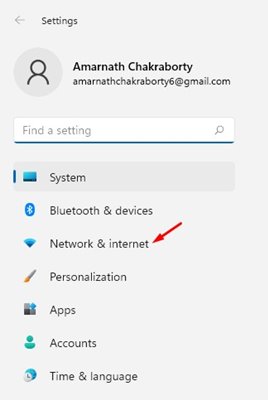
2. On the Settings page, click on the Network & Internet option.
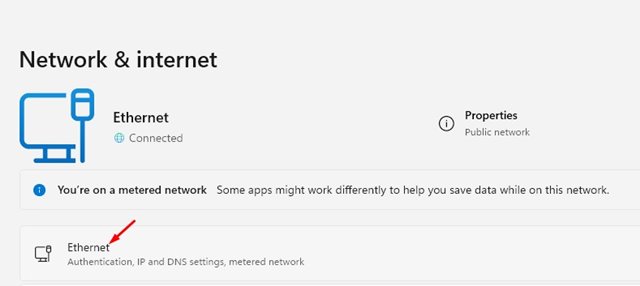
3. Then, click on the WiFi or Ethernet depending on your internet connection on the right pane.
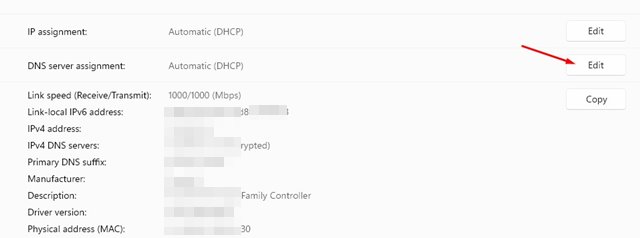
4. Now scroll down and click on the Edit button behind the DNS server assignment.
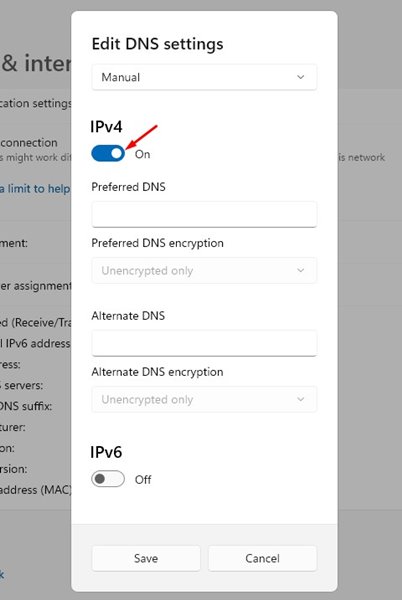
5. From the first drop-down menu, choose Manual and turn on the IPv4 option.
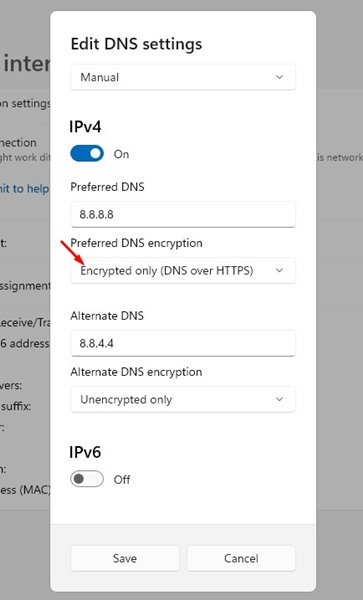
6. Now, on the Preferred and Alternative DNS, enter the DNS server of your choice. I have used Google’s DNS server, so I have set 8.8.8.8 as Preferred DNS and 8.8.4.4 as Alternative DNS.
7. Now, under the Preferred DNS encryption, select Encrypted only (DNS over HTTPS).
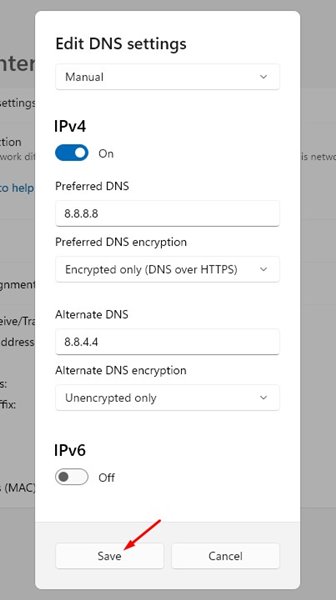
8. After making the changes, click on the Save button.
That’s it! You are done. This will enable DNS over HTTPS on your Windows 11 PC.
So, this guide is all about how to enable DNS over HTTPS on your Windows 11 PC. I hope this article helped you! Please share it with your friends also. If you have any doubts related to this, let us know in the comment box below.
The post How to Turn On DNS Over HTTPS on Windows 11 appeared first on TechViral.

