USB devices are excellent tech accessories mainly used to store and transfer files. They are fast, and you can write anything you want whenever you want. The best thing about these USB devices is that you can carry this small portable storage anywhere.
However, these electronic devices tend to corrupt, misbehave, and stop working as intended. Until now, we have shared a few best tutorials on USB, like how to Recover Unallocated Space, How to fix USB device not recognized errors, etc. Today we are going to discuss another USB error that displays ‘Windows was unable to format Pen Drive’
Best Ways to Fix Windows Was Unable To Complete The Format Error
The ‘Windows was unable to format PenDrive’ error mainly occurs when users try to format the pen drive. This is a standard error, and almost all Windows users might have faced it already. So, here in this article, we will share some of the best methods to fix the ‘Windows was unable to format the pen drive’ error message from your computer.
1. Check For Errors
For those who don’t know, the Windows operating system offers a built-in Error-checking utility that can fix most USB Related errors. So, in this method, we will use the Error-checking utility to fix Windows unable to format pen drive error.
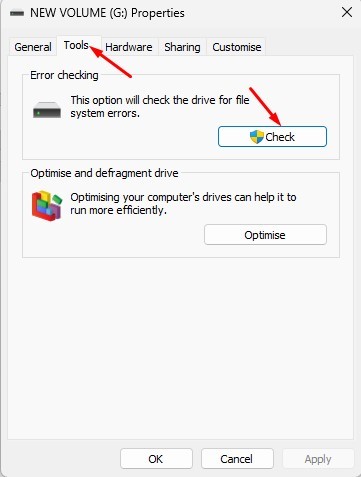
1. In the first step, open File Explorer and right-click on the Pendrive. From the Right-click menu, select Properties.
2. You need to head to the Tools tab and click on Check under Error-checking.
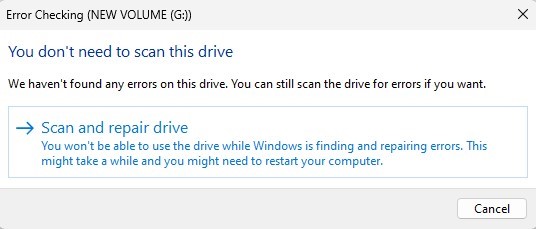
3. Now, you will see another pop-up window. Click on the Scan and Repair Drive option.
That’s it! Now the error checking utility will check for errors. Once done, try to format again; this time, you will not get the error message.
2. Update USB Driver
Sometimes, the ‘Windows was unable to format the pen drive’ error occurs due to outdated USB Drivers. So, in this method, we will update the USB Drivers to fix the Windows unable to format error message from the computer.
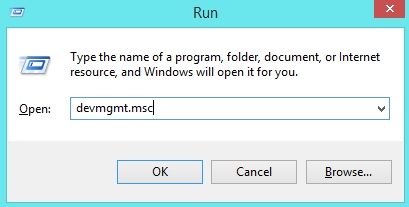
1. First, open the RUN dialog box on your computer. Press the Windows Key + R simultaneously and then type in devmgmt.msc. Press Enter.
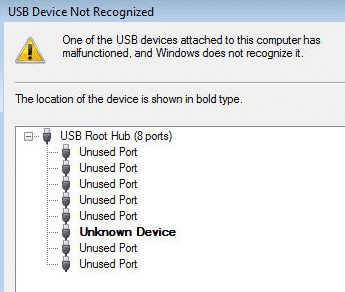
2. Now, you will see the Device Manager. There you need to find and expand the Universal Serial Bus Controllers. There you need to find the corrupted USB devices. Look for the Unknown Devices, right-click on it, and click on Properties.
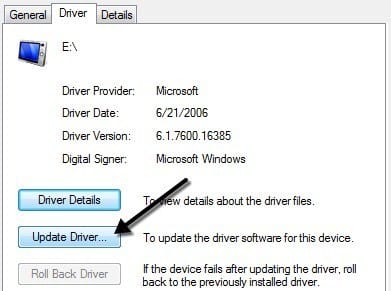
3. In the next Window, click on ‘Update Driver’ and select the option Search for driver automatically.
That’s it! Now the utility will automatically search for the latest version of the USB driver and will install it on your device.
3. Using Command Prompt
If the above two methods have failed to fix the ‘Windows was unable to format Pen Drive’ error message, then you need to use the Command Prompt. Through Command Prompt, you can easily format your pen drive. Here’s how you can use CMD to format Pendrive.
1. First, connect your Pen Drive to the computer and remove all other USB devices.
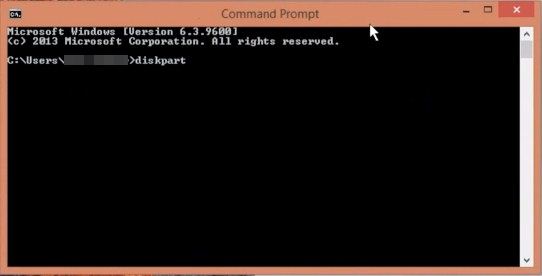
2. Now open Command Prompt as administrator, type in diskpart, and hit enter.
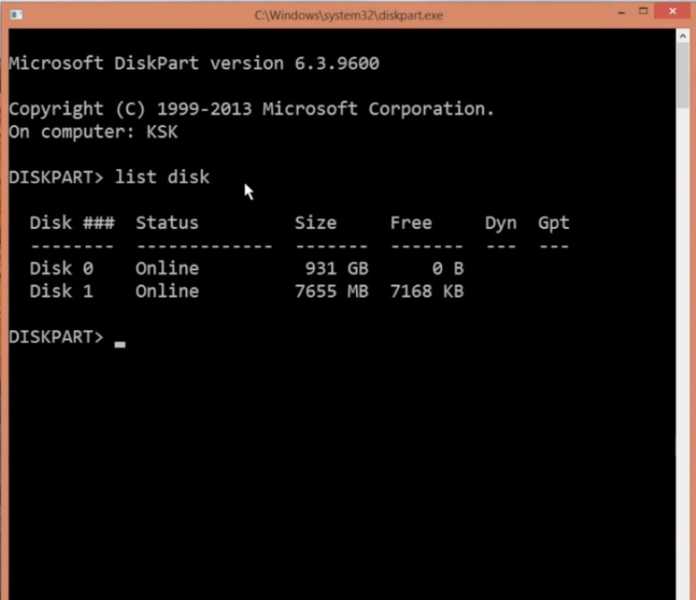
3. In the next step, you must type list disk. It will list all connected devices. Note down the disk number of your USB Device.
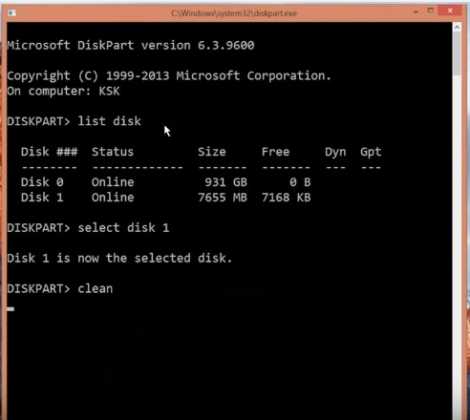
4. Now you need to type in select disk disk_number. Make sure to replace the ‘disk_number’ with your disk number.
5. Now type in clean and press Enter.
That’s it! This is how you can use the command prompt to fix the ‘Windows was unable to format Pen Drive’ error from your computer.
4. Using EaseUS Partition Tool
EaseUS Partition Tool is one of the best and top-rated Windows Partition management software. You can also use EaseUS Partition Tool to format any USB drive. However, follow this method only if the above methods fail to fix the error message. So, here’s how you can use EaseUS Partition Tool to fix Windows was unable to complete the format error message.
1. First of all, download & install EaseUS Partition Tool from this link on your Windows 10 computer.
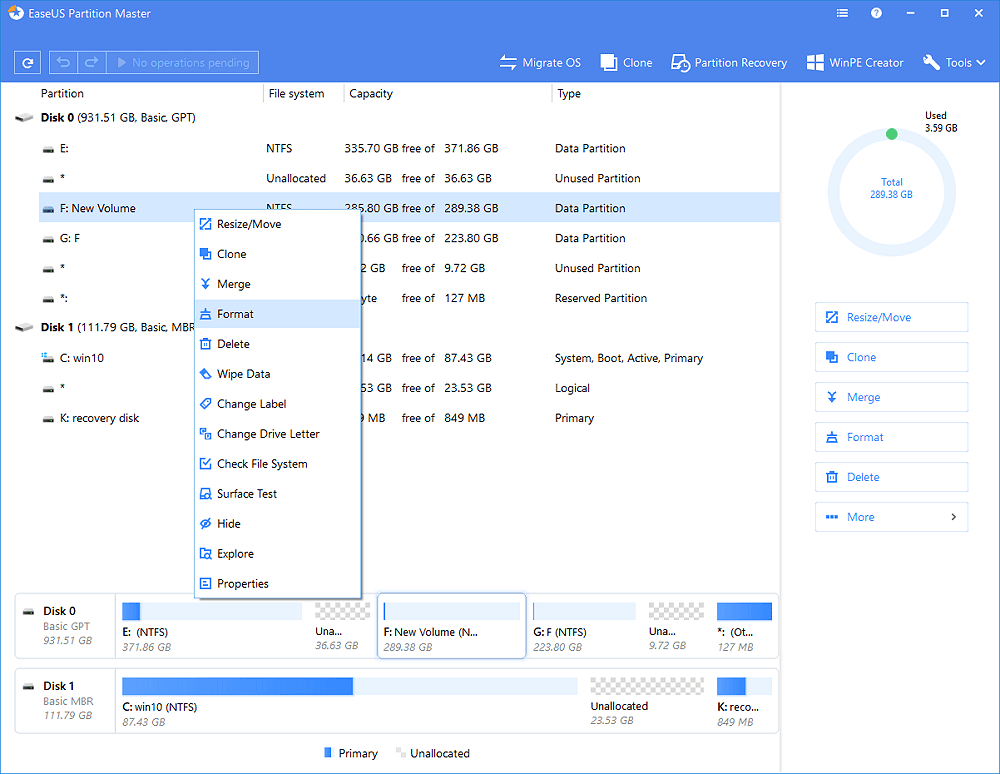
2. Once downloaded, open the tool. Right-click on the drive which you want to format and select Format.
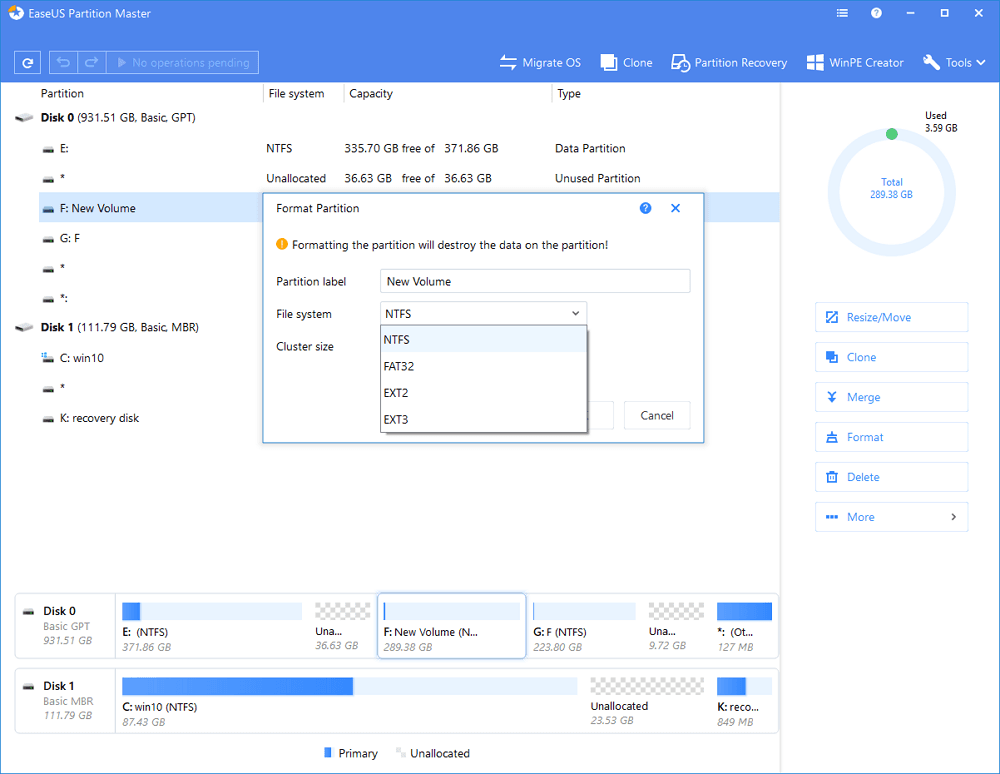
3. In the next step, you will be asked to set the Partition label. Next, select the file system.
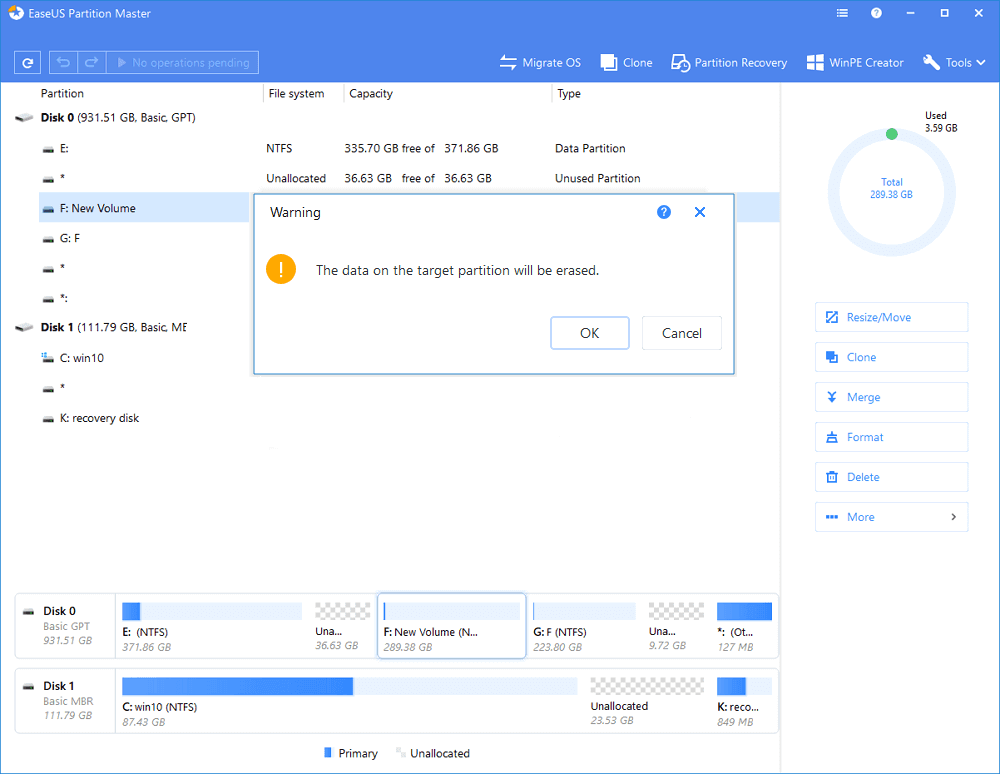
4. Now, you need to click on Ok.
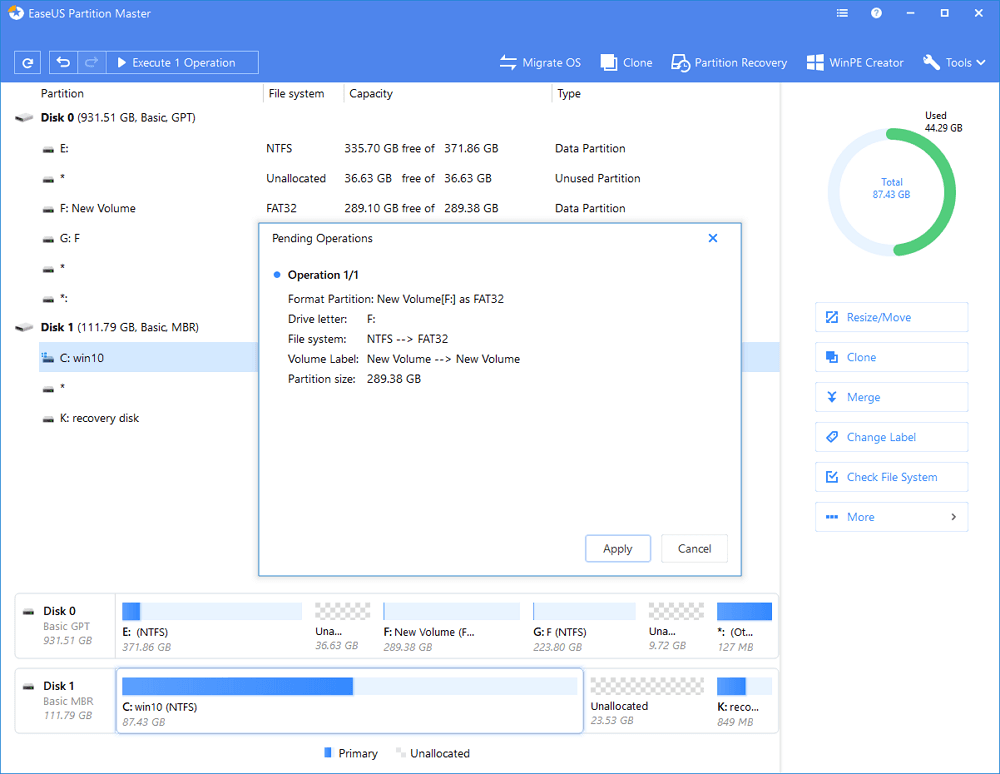
5. In the final step, click on Execute Operation and Apply.
That’s it! Depending upon the processing speed, EaseUS Partition Tool will complete the process.
So, these are the best methods to fix the ‘Windows was unable to format Pen Drive’ error from your computer. The best thing is that these methods work on almost all Windows operating systems, including Windows 11. If you know any other method to fix the USB Format error, let us know in the comment box below.
The post How To Fix Windows Was Unable To Complete The Format Error appeared first on TechViral.


