Both Windows 10 and Windows 11 ship with a task management utility known as Task Manager. Task Manager on Windows is helpful as it can kill tasks, put apps in hibernation mode, and more.
Even if you don’t want to kill tasks, you can use Task Manager to monitor the RAM, CPU, Disk, and Network usage. The reason we are talking about the Task Manager is that Microsoft revamped the look of the classic Task Manager app on Windows 11.
Windows 11 includes a new Task Manager application that looks very different from the one seen on older versions of Windows. The task manager has rounded corners, a new design layout, and more. Also, Microsoft introduced a few new customization options with the Task Manager.
When you launch the Task Manager, you will see the Processes page by default. The processes page displays all apps running in the background and the number of resources they consume. On Windows 11, you can change the start page of Task Manager to show any other option.
Also read: How to Run Task Manager As Administrator in Windows 11
Best Ways to Change the Default Start Page of Windows 11 Task Manager
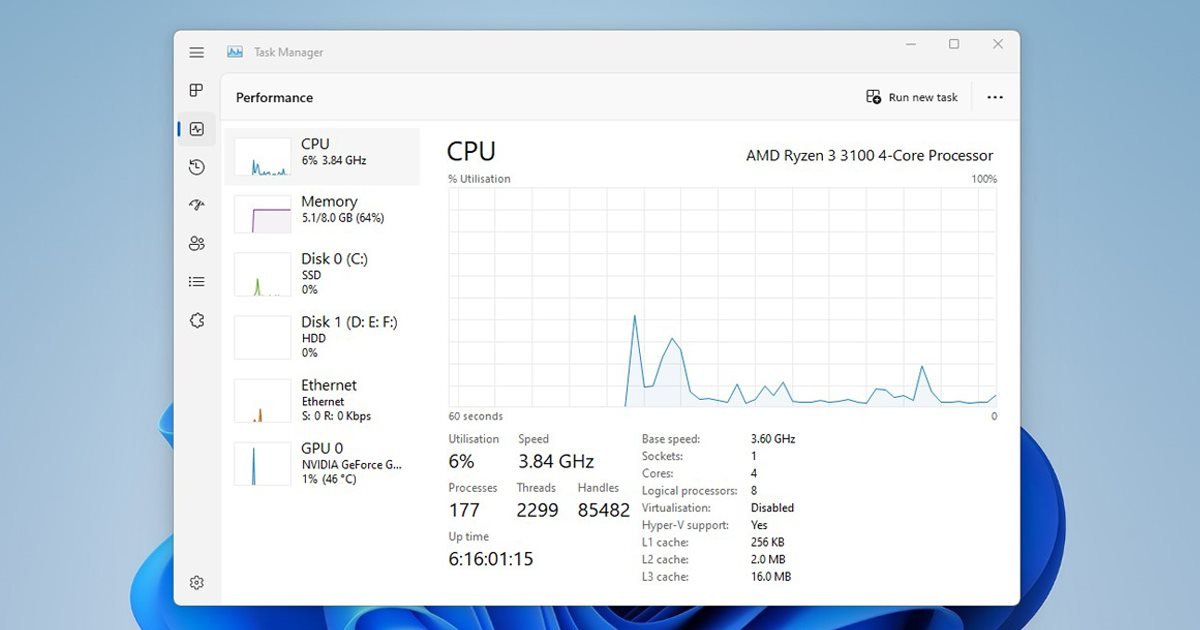
For example, you can set Task Manager always to show the Performance page when you launch it. Similarly, you can set App History or Users as the Start page on Windows 11 Task manager.
Below, we have shared a few easy ways to change Start Page in Windows 11’s Task Manager. Let’s get started.
1) Change the Start Page for Task Manager
Here we will modify some of Task Manager’s settings to change the Start Page. Here are some of the simple steps you need to follow.
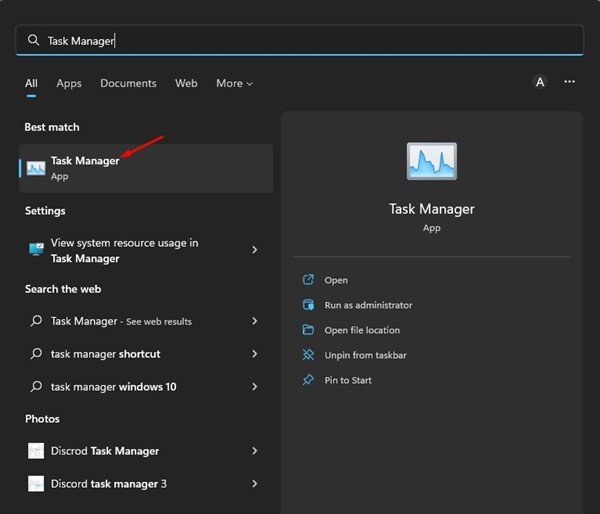
1. First, click on the Windows 11 search and type Task Manager. Next, open the Task Manager app from the list of options.
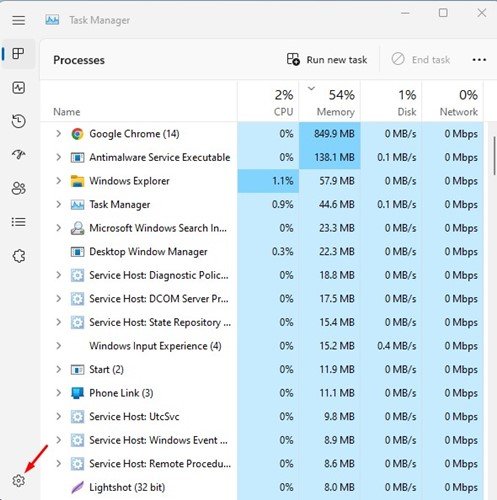
2. On the Task Manager, click on the Settings icon at the bottom left corner.
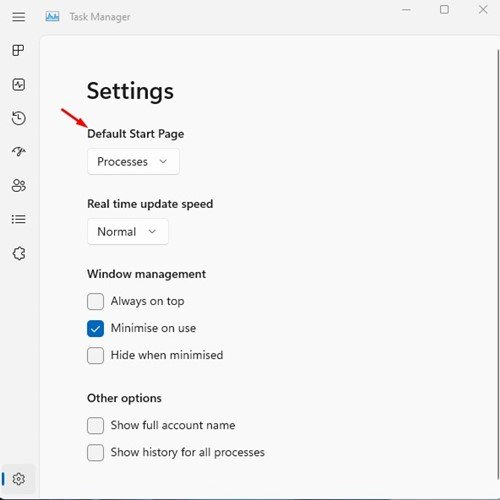
3. On the Settings page, click the Default Start Page drop-down and select the page you want to see.
That’s it! This is how you can change the Start Page in Windows 11 Task Manager.
2) Change the Start Page in Windows 11 Task Manager via Registry
Here we will use the Registry Editor on Windows 11 to change the default page for Task Manager. Follow some of the simple steps we have shared below.
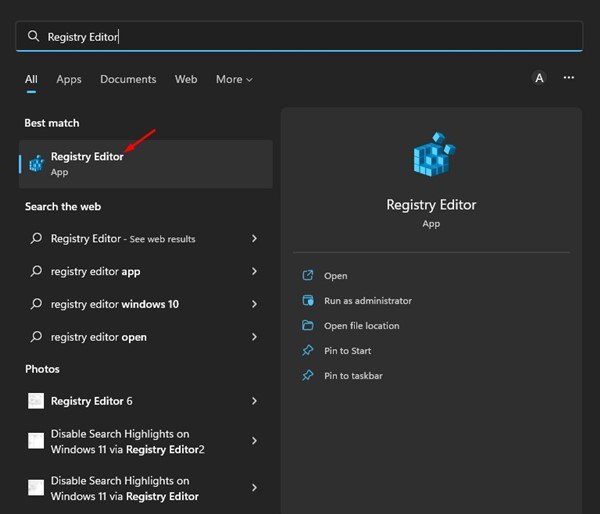
1. Click on the Windows 11 Search and type in Registry Editor. Next, open the Registry Editor app from the list of options.
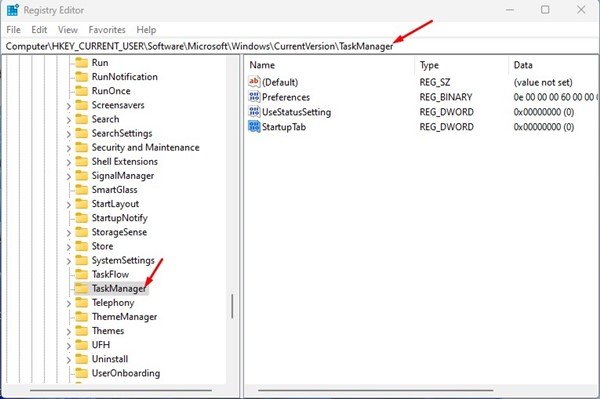
2. On the Registry Editor, navigate to the following path:
HKEY_CURRENT_USER\Software\Microsoft\Windows\CurrentVersion\TaskManager
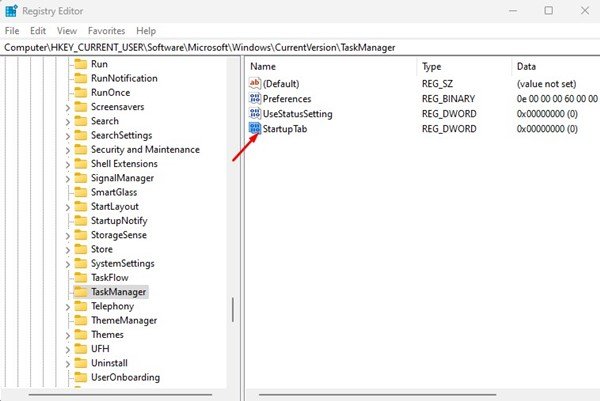
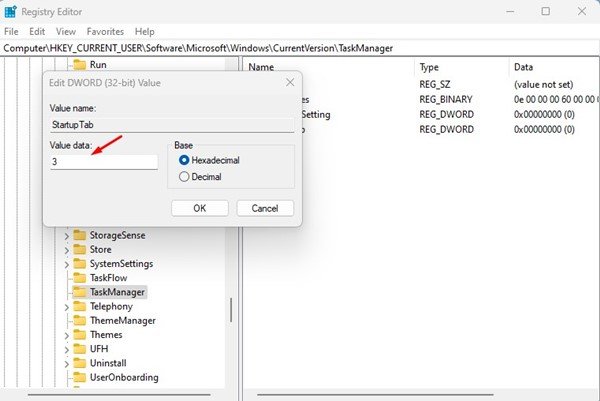
3. On the right side, double click on the StartUpTab and sets its value to one of the following numbers:
- 0 – Sets Processes as default Start Page
- 1 – Sets Performance as the default page
- 2 – Sets App History as default start page.
- 3 – Opens Startup apps page by default
- 4 – Opens the Users page by default.
- 5 – Opens the Details page by default
- 6 – Sets Services as default start page.
4. You need to set the StartUpTab value to one of the following numbers and click on the Ok button.
That’s it! After making the changes close the Registry Editor and restart your Windows 11 PC. After the restart, Task Manager will always show you the page you have set.
Also Read: How to Download & Install Windows 11 On PC/Laptop
So, that’s how easy it is to change the default start page of Windows 11 Task Manager. If you need more help, let us know in the comment box below.
The post How to Change Default Start Page of Windows 11 Task Manager appeared first on TechViral.

