On Windows, you don’t need to use any third-party data encryption tool to encrypt your data or hard disk drives. The operating system has a security feature called BitLocker that lets you password protect the industries.
BitLocker is a built-in security feature on Windows 11 that prevents unauthorized access to your files & documents by encrypting your drive. The security tool is free to use and can password protect HDD, SSD, and even portable drives.
If you are already using BitLocker to secure your drive, updating the BitLocker password periodically is recommended. Changing BitLocker password periodically is one of the easiest ways to ensure accounts and protected drives stay secure.
Also read: How to View WiFi Password in Windows 11
3 Best Ways to Change the BitLocker Password in Windows 11
Hence, in this guide, we will share a few easy methods to change the BitLocker password on Windows 11. While changing the BitLocker password, make sure to set a strong password. Here’s how to change your BitLocker password on Windows 11.
1) Changing the BitLocker Password from the Context Menu
You can change the Bitlocker password of the protected drive right from Windows 11’s File Explorer. For that, follow some of the simple steps we have shared below.
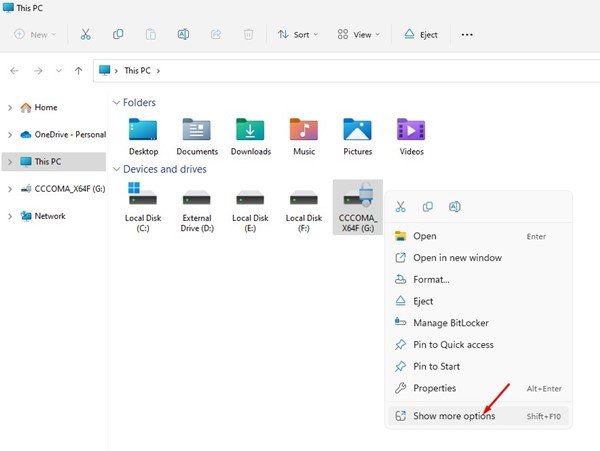
1. Open File Explorer on Windows 11 and right-click on the protected drive. Next, select Show more options to open the classic context menu.
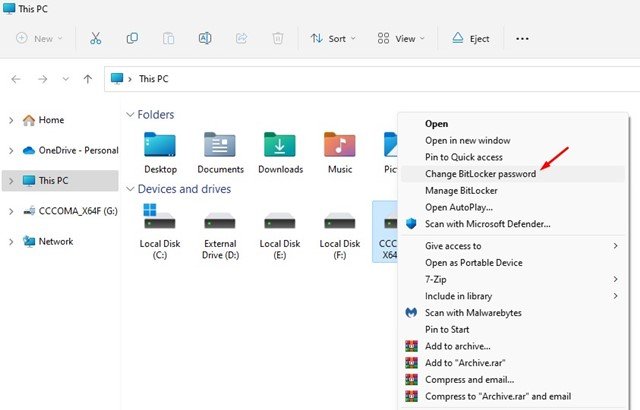
2. Select the Change BitLocker password option on the full context menu.
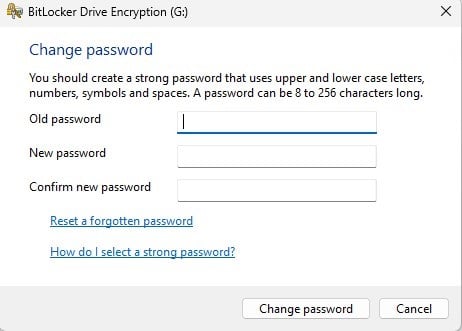
3. Enter your current password and set the new one on the Change password prompt. Once done, click on the Change password button.
That’s it! This will change the BitLocker password for your protected drive on Windows 11.
2) Change BitLocker Password via Command Prompt
You can also utilize the Command Promot utility to change the BitLocker password on Windows 11. For that, follow some of the simple steps we have shared below.
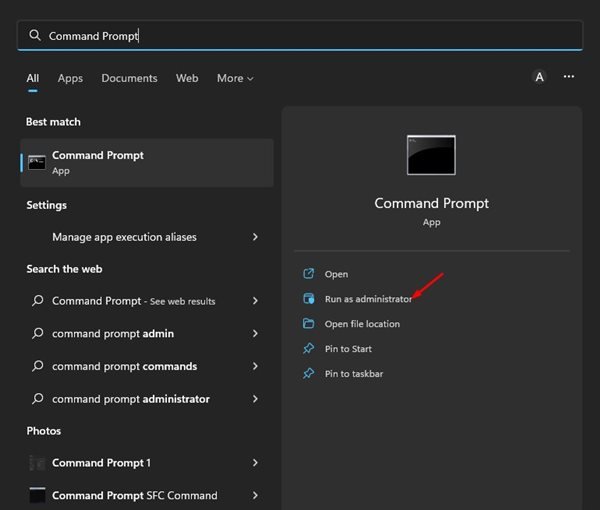
1. Click on the Windows 11 search and type in CMD. Next, right-click on the Command Prompt, and select Run as administrator.
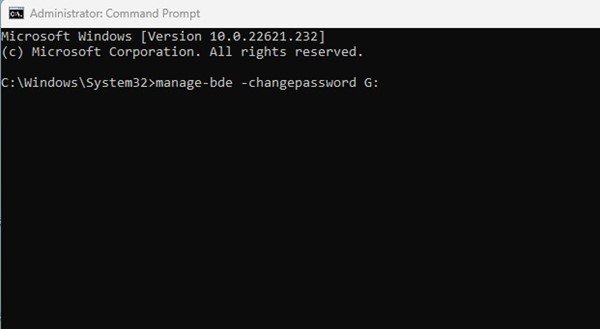
2. On the Command Prompt, type manage-bde -changepassword G: and hit the Enter button.
Important: Replace the G at the end of command with the drive letter for your drive.
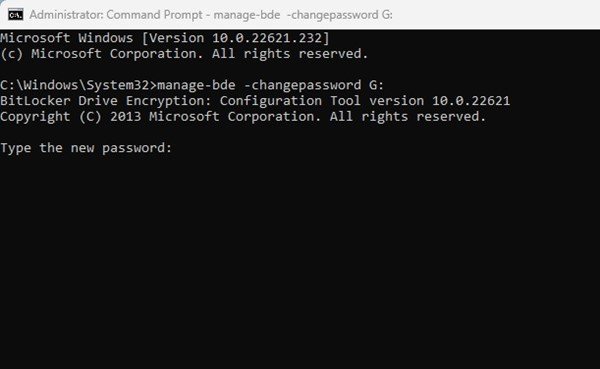
3. Now command prompt will ask you to enter & confirm your new password.
Note: Command Prompt will only be able to change the password if the drive is unlocked. You must unlock it and then repeat the steps if it’s locked.
That’s it! This is how you can change the BitLocker password for your drive via Command Prompt utility.
3) Change BitLocker Password for Drive via Control Panel
We are going to use Control Panel to access the BitLocker Manager. BitLocker Manager allows you to change the password for your protected drives in easy steps. Here’s what you need to do.
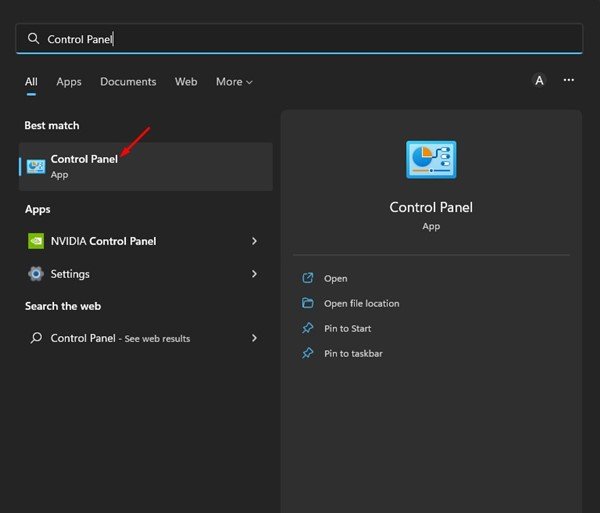
1. First, click the Windows 11 search and type in Control Panel. Next, open the Control Panel app from the list of matching results.
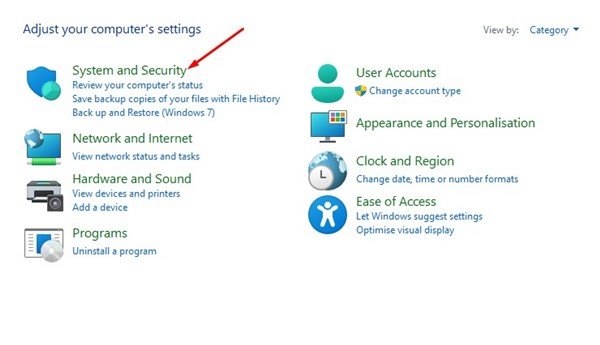
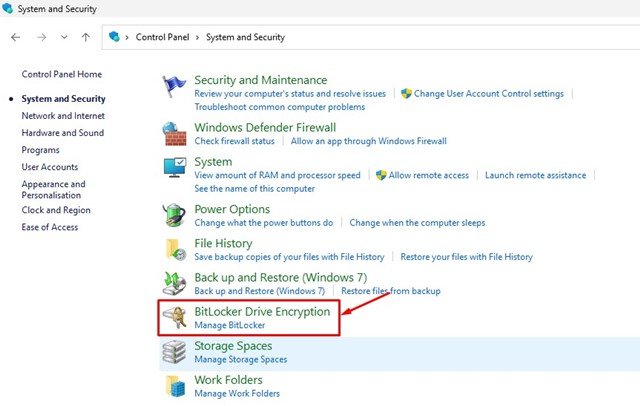
2. Click on the System and Security option on the Control Panel.
3. On the System and Security, click on the BitLocker Drive Encryption.
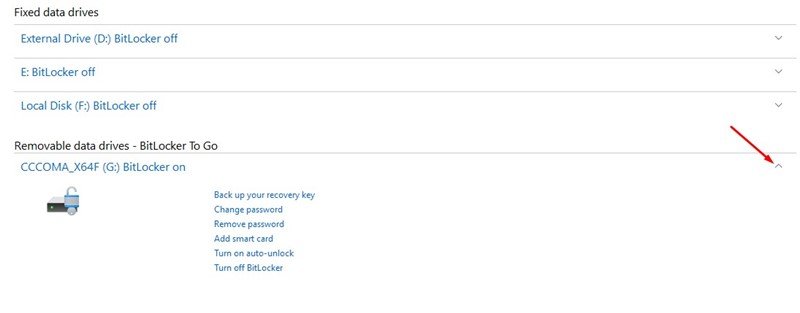
4. On the BitLocker Drive Encryption screen, expand the drive you want to change the password for.
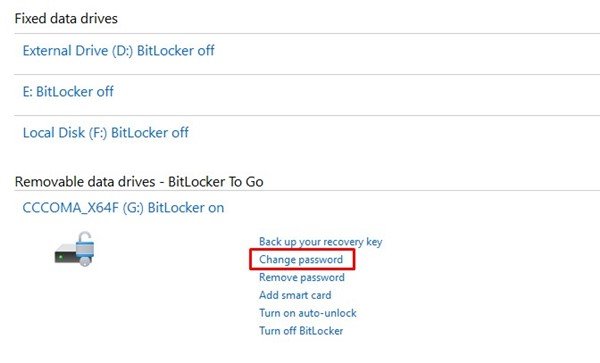
5. Once done, click on the Change password link.
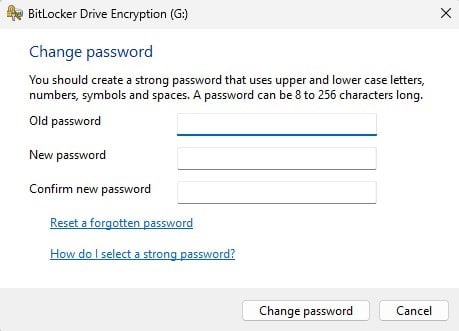
6. Enter and confirm your new password on the Change Password prompt. Once done, click on the Change Password button.
That’s it! This is how you can change the BitLocker password via Control Panel on Windows 11.
So, these are some of the best and easiest methods to change BitLocker passwords for protected drives on Windows 11. If you’ve just discovered BitLocker and want to turn on drive protection, you need to follow our guide: How to Enable & Use BitLocker to Go on Windows 11. If you need any more help related to updating the BitLocker password, let us know in the comments below.
The post How to Change the BitLocker Password in Windows 11 appeared first on TechViral.

